


The BEST EVER Gluten Free Cheese Scones made from just a handful of basic pantry ingredients.
With a couple of very simple ingredient twists, those on a gluten free diet can enjoy these delicious warm, light and fluffy cheese scones without any fuss!
Soft, warm and fluffy scones are one of the most budget friendly recipes to make and they take no time at all!
Whether your preference is for sweet scones, such as my easy fruit scones and the famous lemonade scones recipe, or whether you prefer savoury scones, either way, a warm batch can be ready to eat in less than 30 minutes!
Recently I posted a recipe for the ever-popular cheese scones, however with those on a gluten-free diet in mind, I thought I’d adapt the recipe to suit!
Gluten free certainly doesn’t lack anything in taste – just try my gluten free pizza dough to prove this (I actually prefer it to the traditional recipe!).
And there’s some ultra delicious gluten free desserts that get top marks too! In fact, my gluten free almond and coconut cake is one of my most popular recipes, along with my decadent fudgy flourless chocolate cake and the elegant lemon and ricotta cake – all gluten free!

Why You’re Going To Love This Recipe
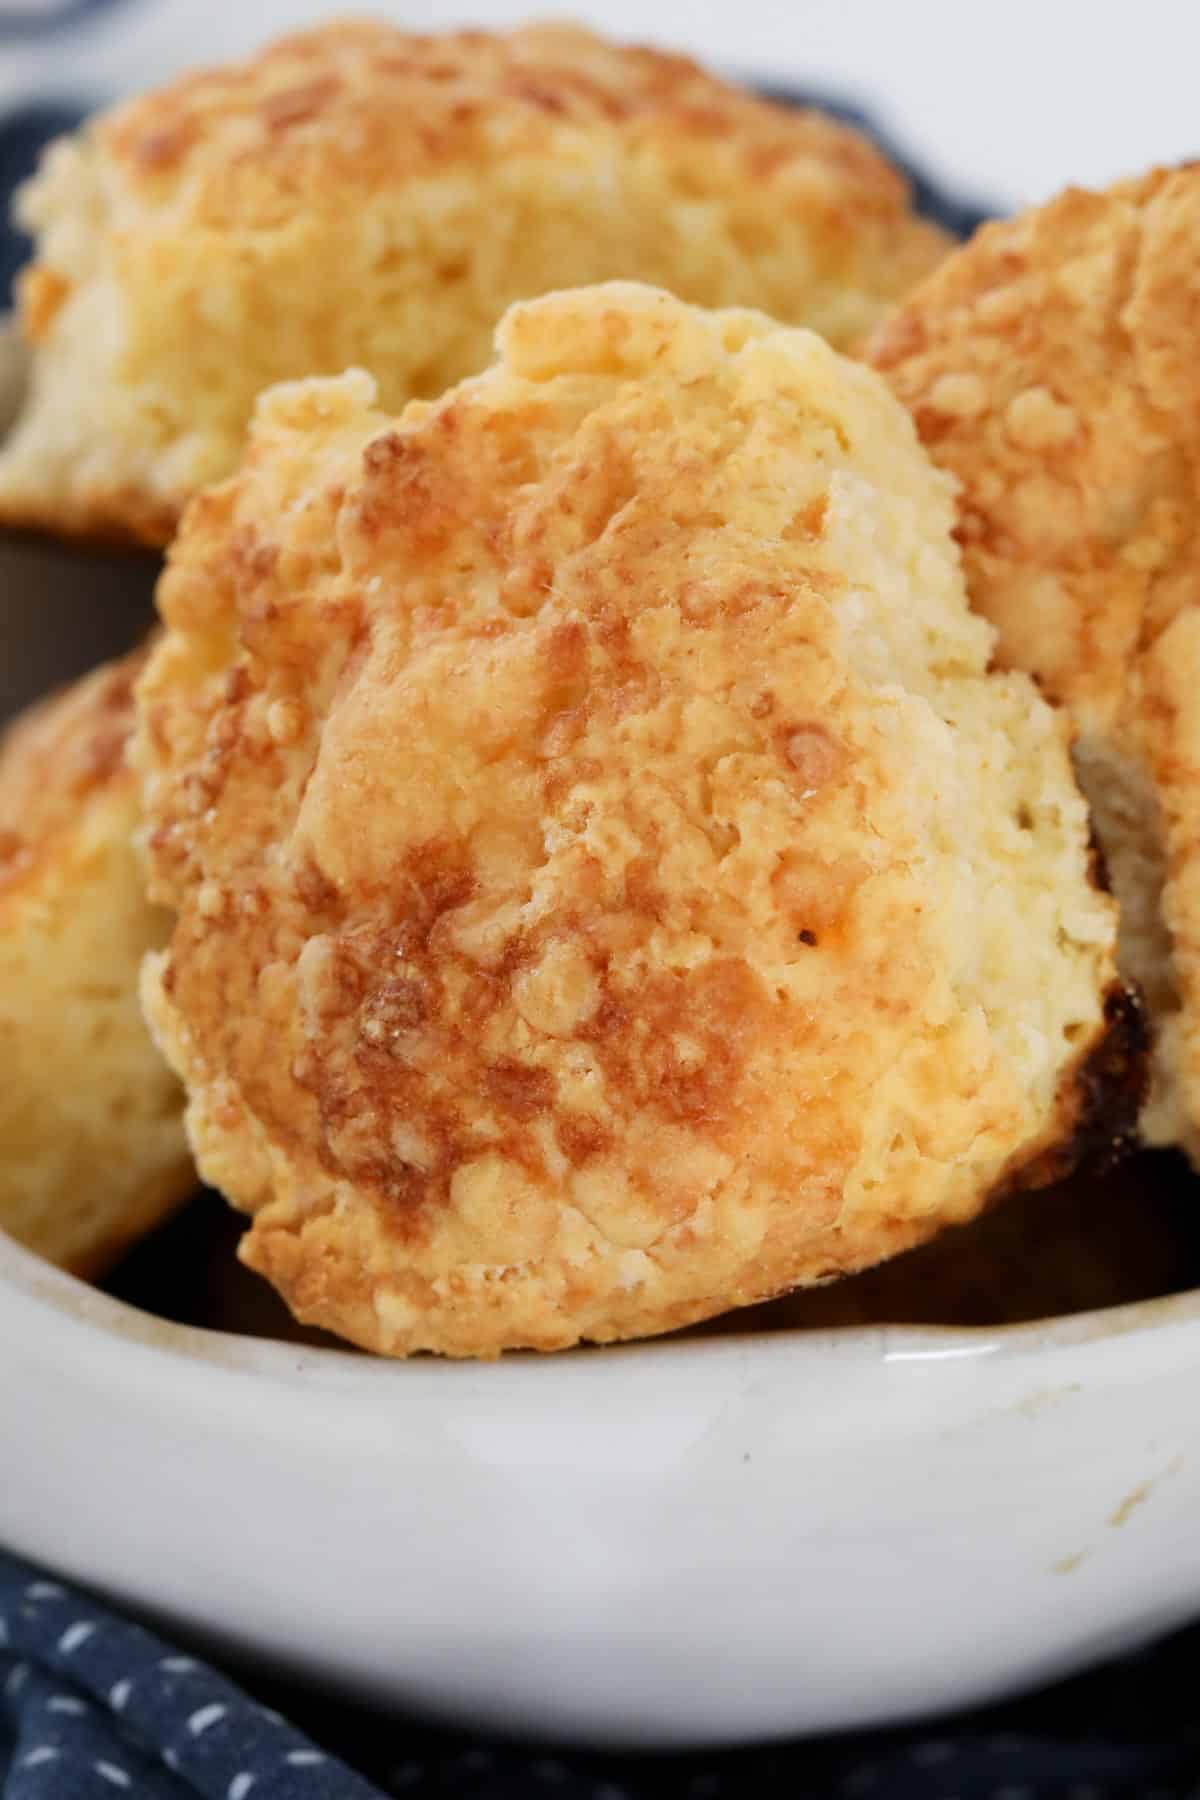
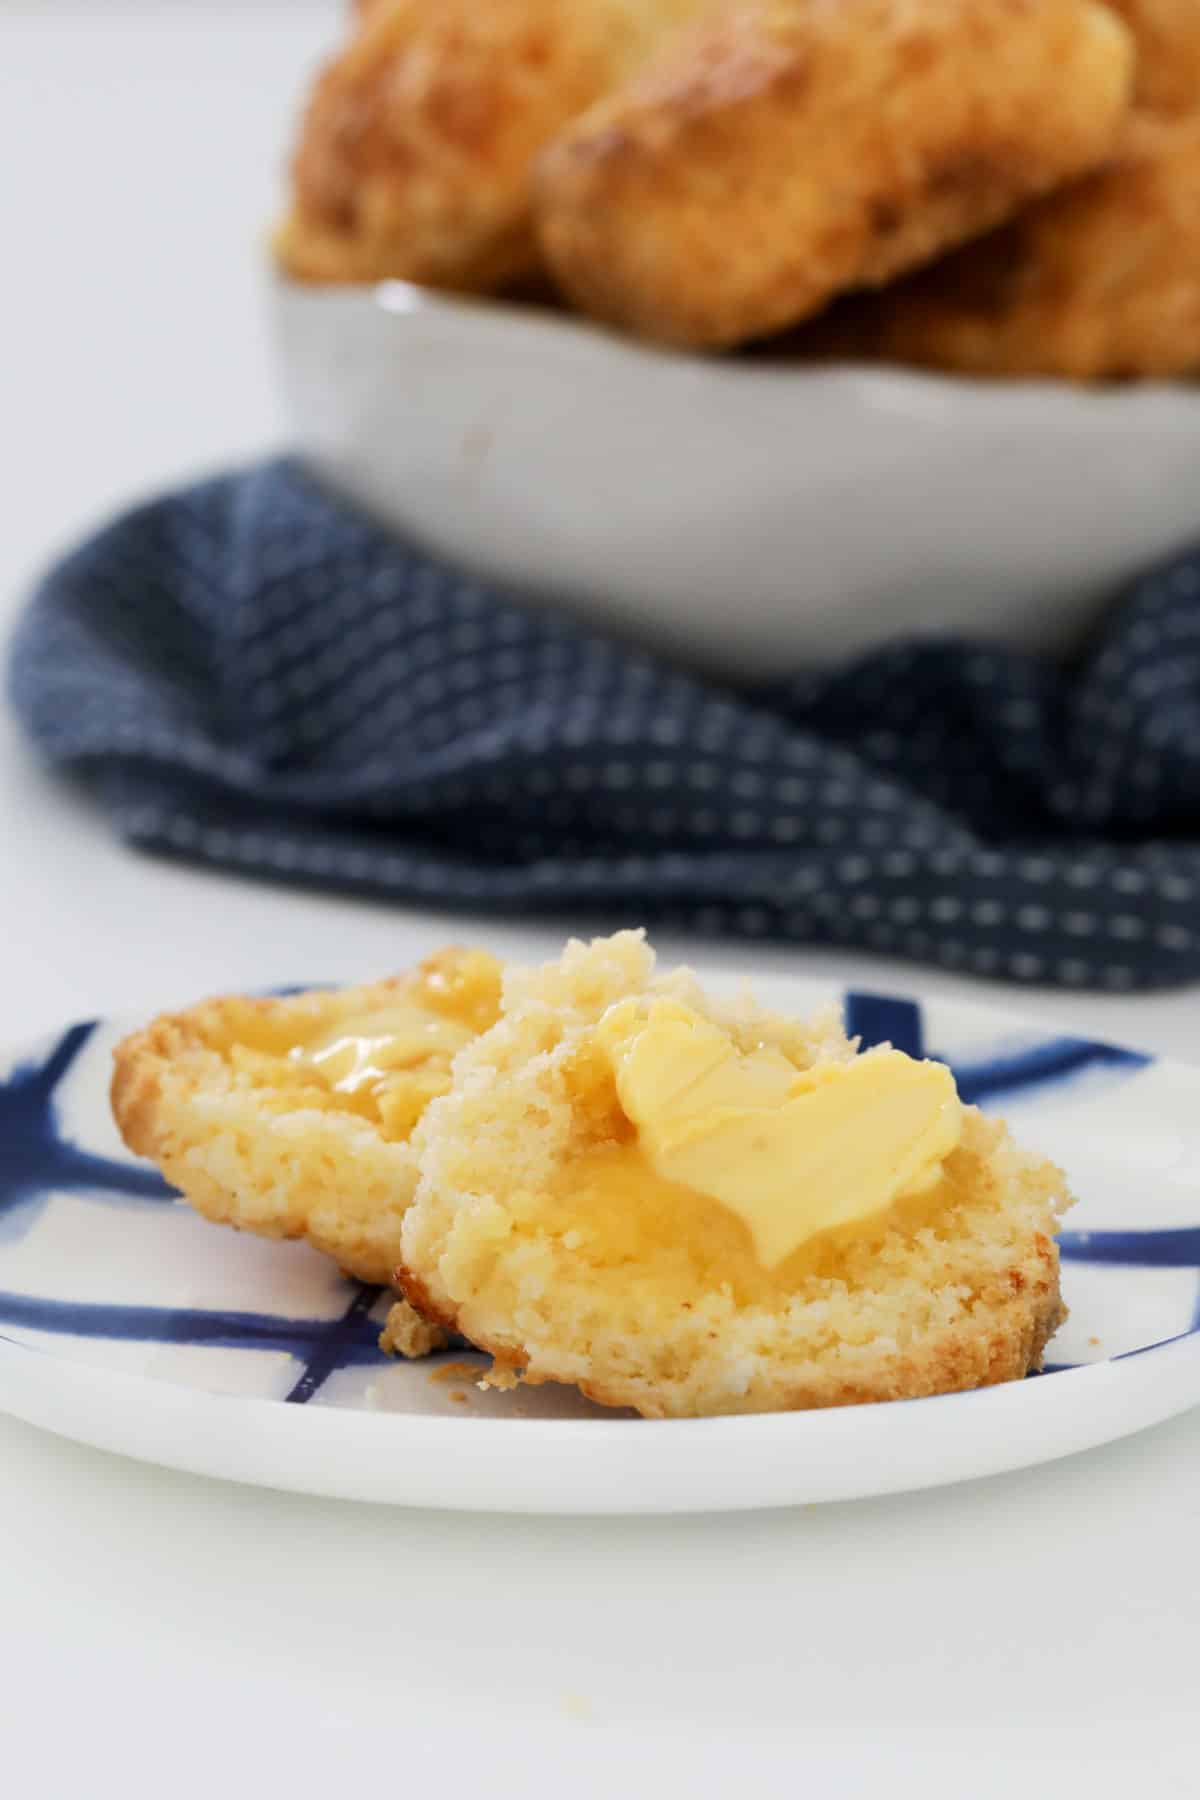
Enjoying a delicious warm cheese scone, split open with butter melting into it, is a true comfort food moment, isn’t it?
- Budget friendly – this simple gluten free cheese scone recipe uses inexpensive ingredients. A batch of these warm cheese scones is a thrifty way to feed a crowd!
- Gluten free – the recipe has been adapted using GF products.
- Basic baking staples – the main ingredients are flour, eggs, milk and cheese, so it’s most likely that you won’t need a trip to the supermarket if you already have GF baking products in the pantry.
- They freeze so well! – scones are always best eaten fresh on the day they are baked, however if you happen to have some left-over scones, just wrap them well, and pop them into the freezer. Scones thaw and reheat extremely well!
- Conventional and Thermomix – instructions for both methods are included in the recipe card below.
What You Need
Thankfully it’s SO MUCH easier to access gluten free baking products from supermarkets these days!
Note: Scroll to the recipe card at the bottom for the ingredients quantities and full detailed method.
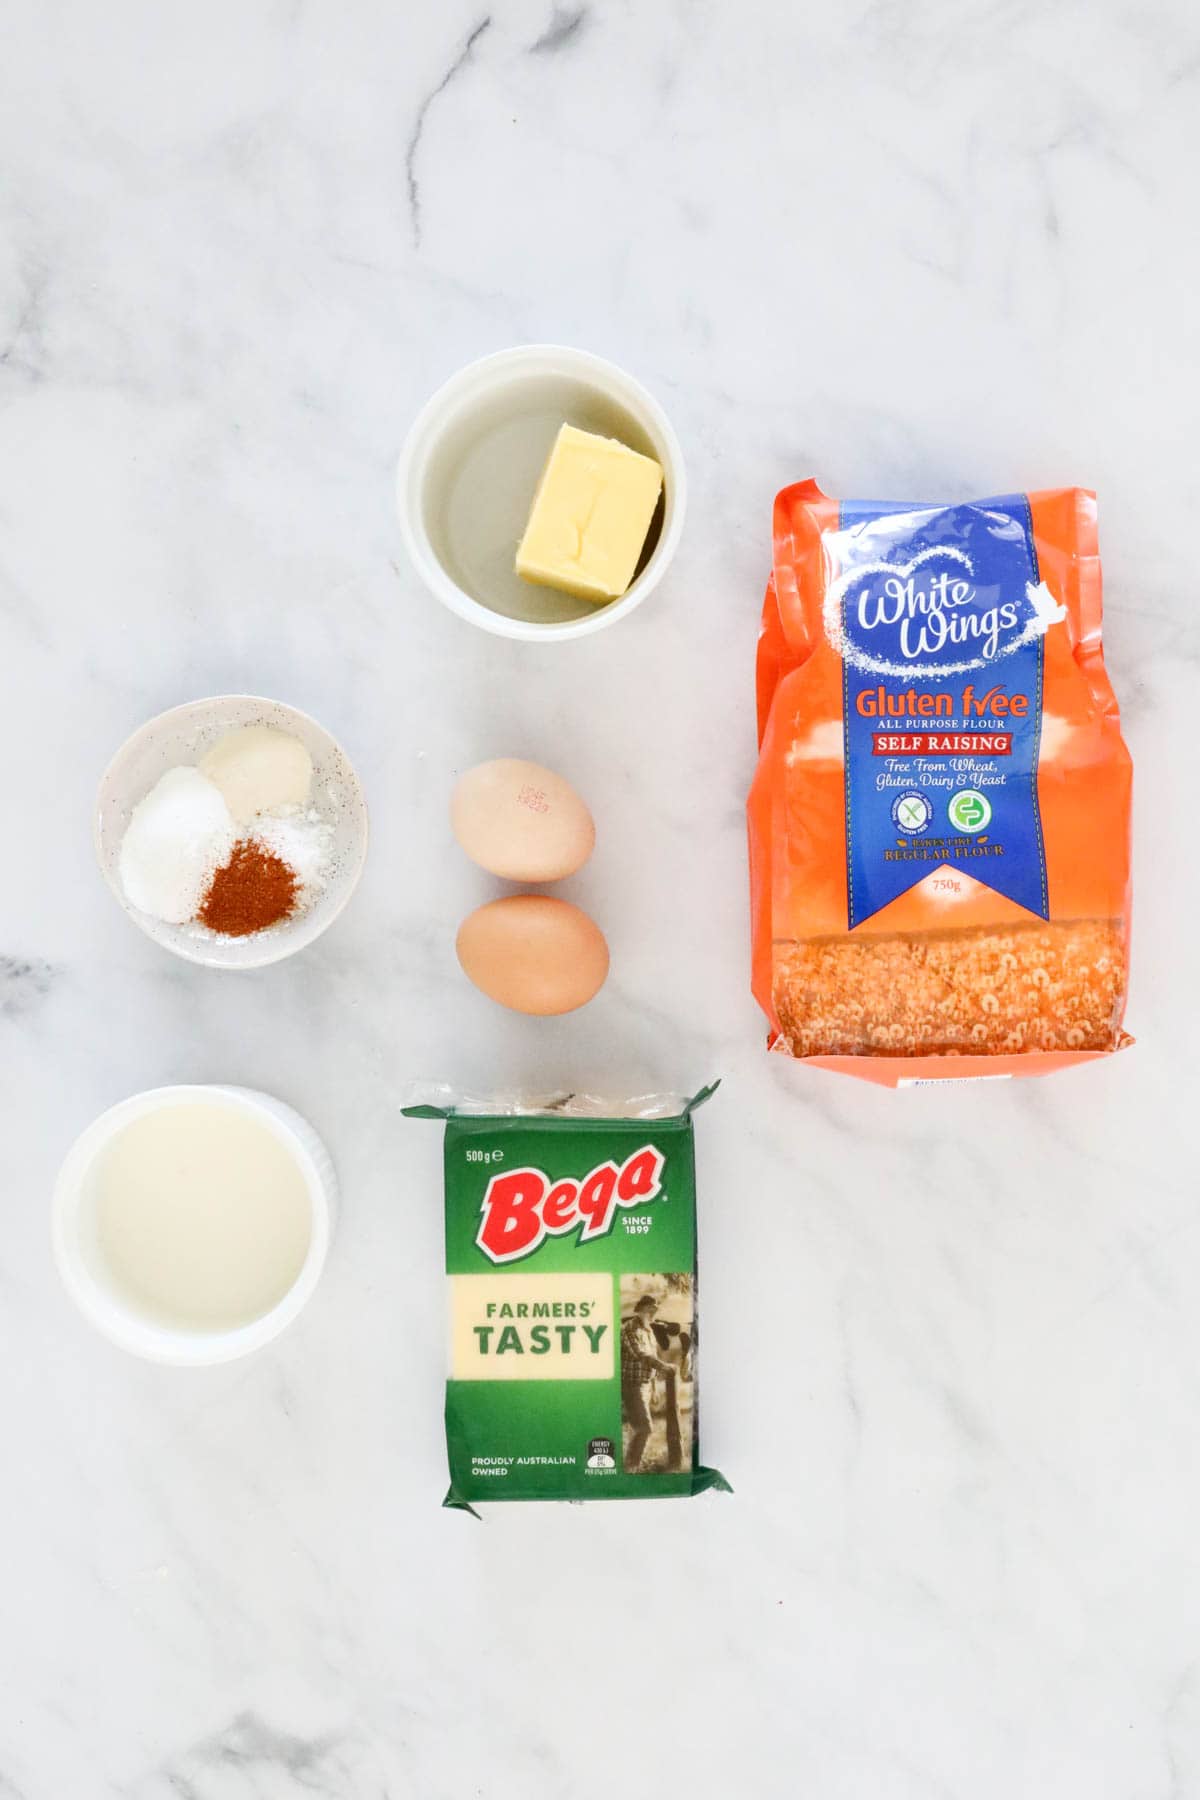
- Gluten free self raising flour – supermarkets now stock a good range of gluten free products as more people are choosing a gluten free diet for a variety of reasons.
- Gluten free baking powder – most baking powders contain baking soda, cream of tartar and a filler like rice flour or corn starch, which are all naturally gluten free ingredients. It should also state gluten free on the product label.
- Xanthan gum – is a natural vegetarian additive used as a thickener, stabiliser and emulsifier, particularly in gluten free baking. You can purchase xanathan gum at supermarkets or health food shops.
- Salt – just a pinch.
- Cayenne pepper – a moderately spicy pepper with a sweet and smokey aroma, just a small amount makes a subtle taste addition to these cheese scones.
- Butter – chilled. Salted or unsalted is fine to use in this savoury recipe.
- Cheddar cheese – grated. For best results, I recommend grating your own cheddar from a block, as pre-shredded cheese contains extra additives such as anti-caking powder.
- Milk – use full-fat milk for best results in gluten free cheese scones. Have your milk at room temperature.
- Eggs – large (60g), at room temperature.
- Extra milk and cheddar cheese – for the top of the scones before baking.
Equipment Required
You don’t need any special equipment to whip up a batch of gluten free cheese scones.
- 20cm square cake tin – lightly floured.
- Large mixing bowl, grater and sifter – or use a food processor or Thermomix.
- Scone cutter and floured board (or bench top) – if you don’t have a scone cutter, or you can simply use a knife to cut your scones into squares or wedges.
- Oven – I specify fan-forced oven temperatures in my recipes, so if you have a conventional oven, increase the temperature by between 10 and 20 degrees Celsius.
Step By Step Instructions
These delicious savoury cheese scones take 10 minutes to prepare and just over 10 minutes to bake. They smell AMAZING when baking too!
Note: Scroll to the recipe card at the bottom for the ingredients quantities and full detailed method.
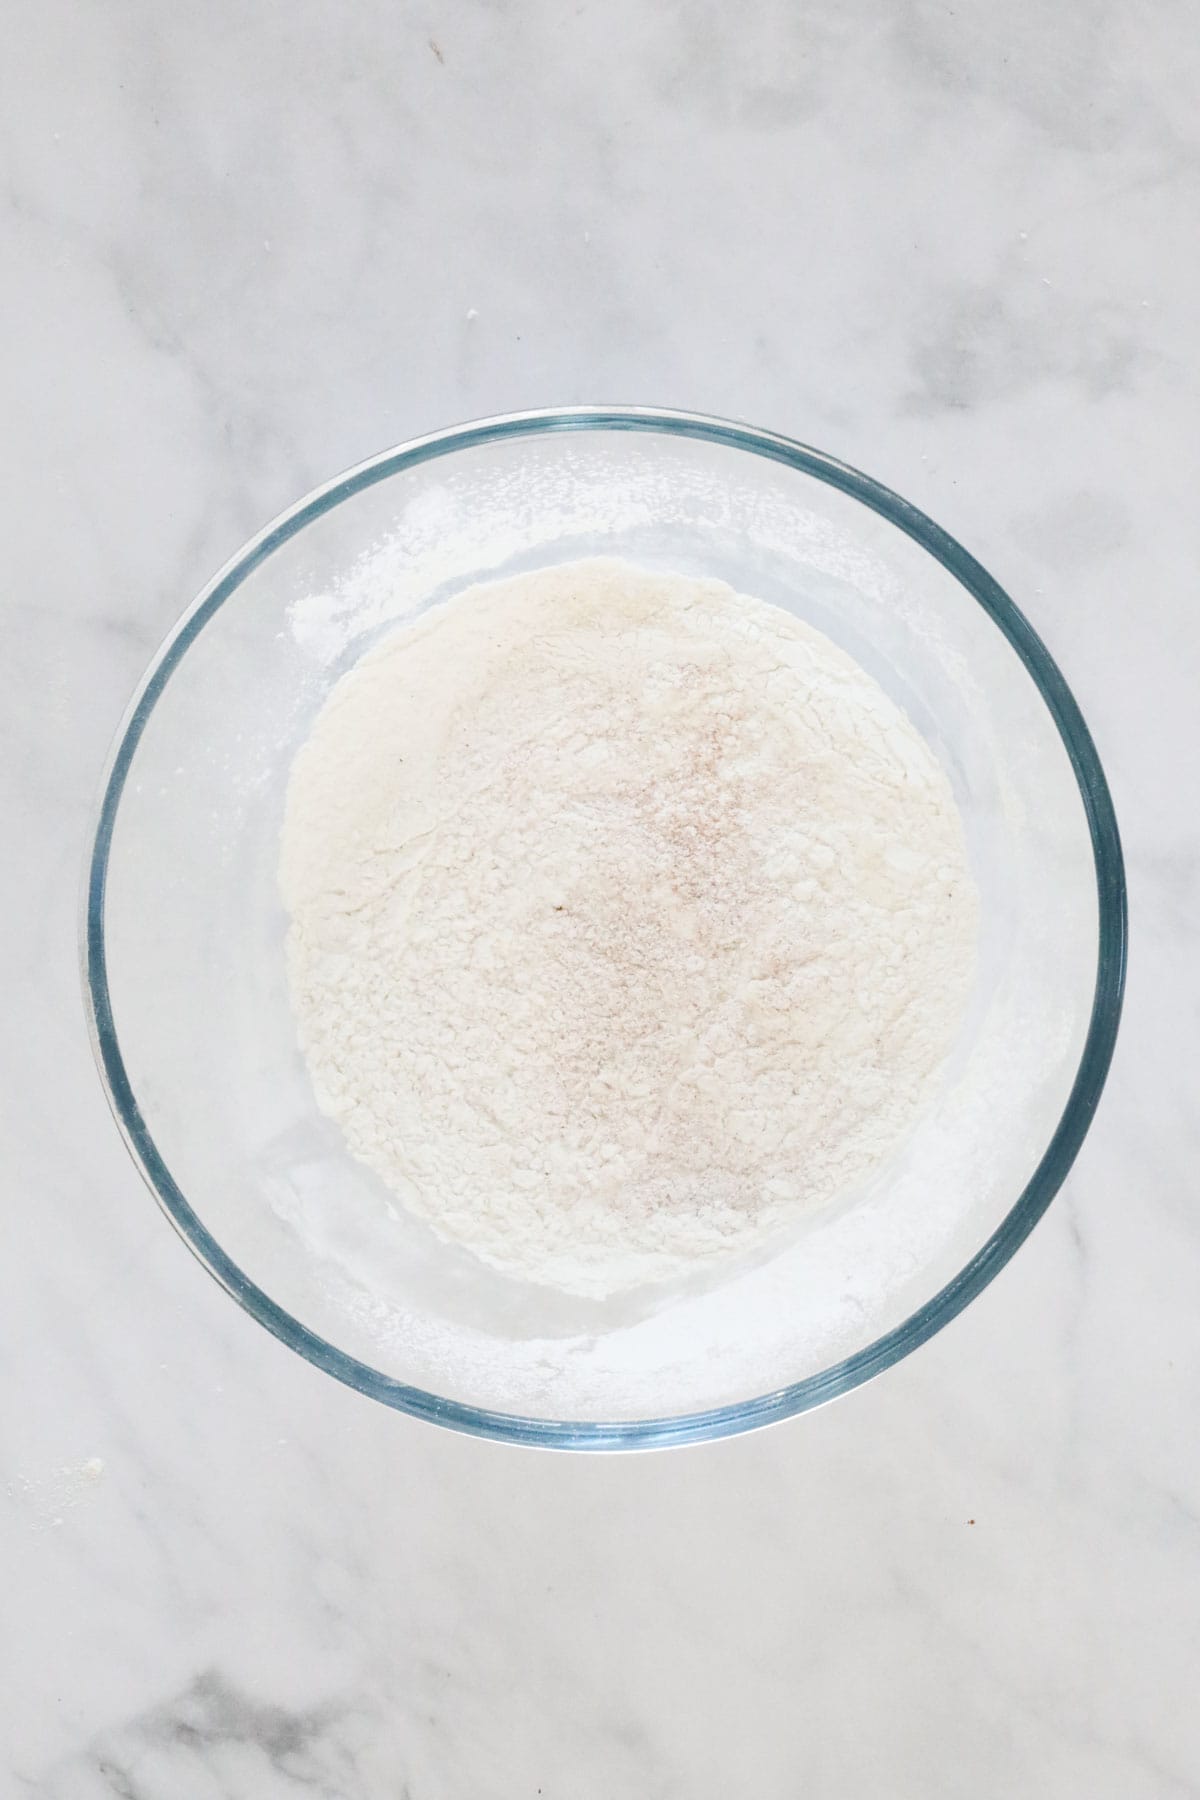
Step 1 – Sift The Dry Ingredients
Preheat oven to 200 degrees celsius (fan-forced). Lightly flour a 20cm square cake tin and set aside.
Sift the self raising flour, baking powder, xanthan gum, salt and cayenne pepper into a large bowl.
Step 2 – Rub The Butter In
Add the butter to the bowl of sifted flour.
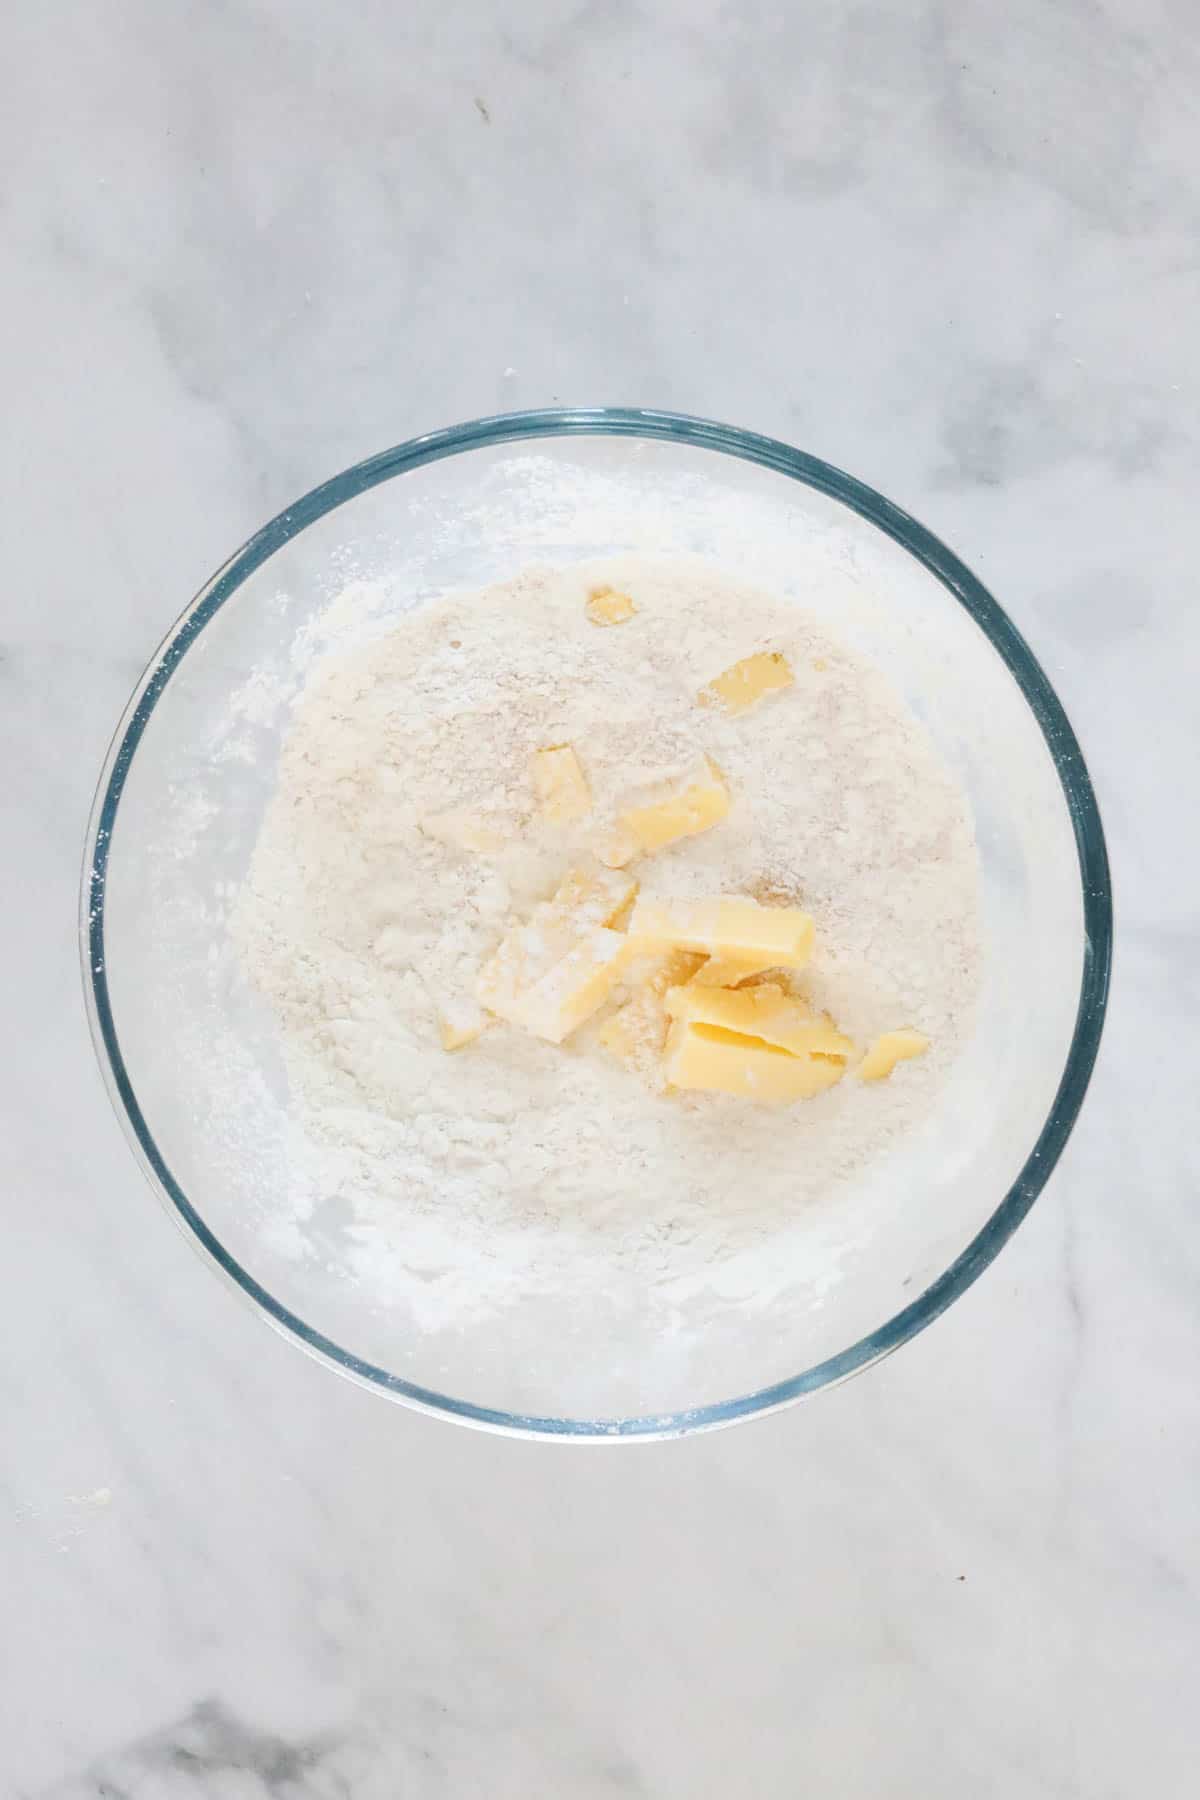
Rub the butter through the flour mixture with your fingers until the mixture resembles breadcrumbs.
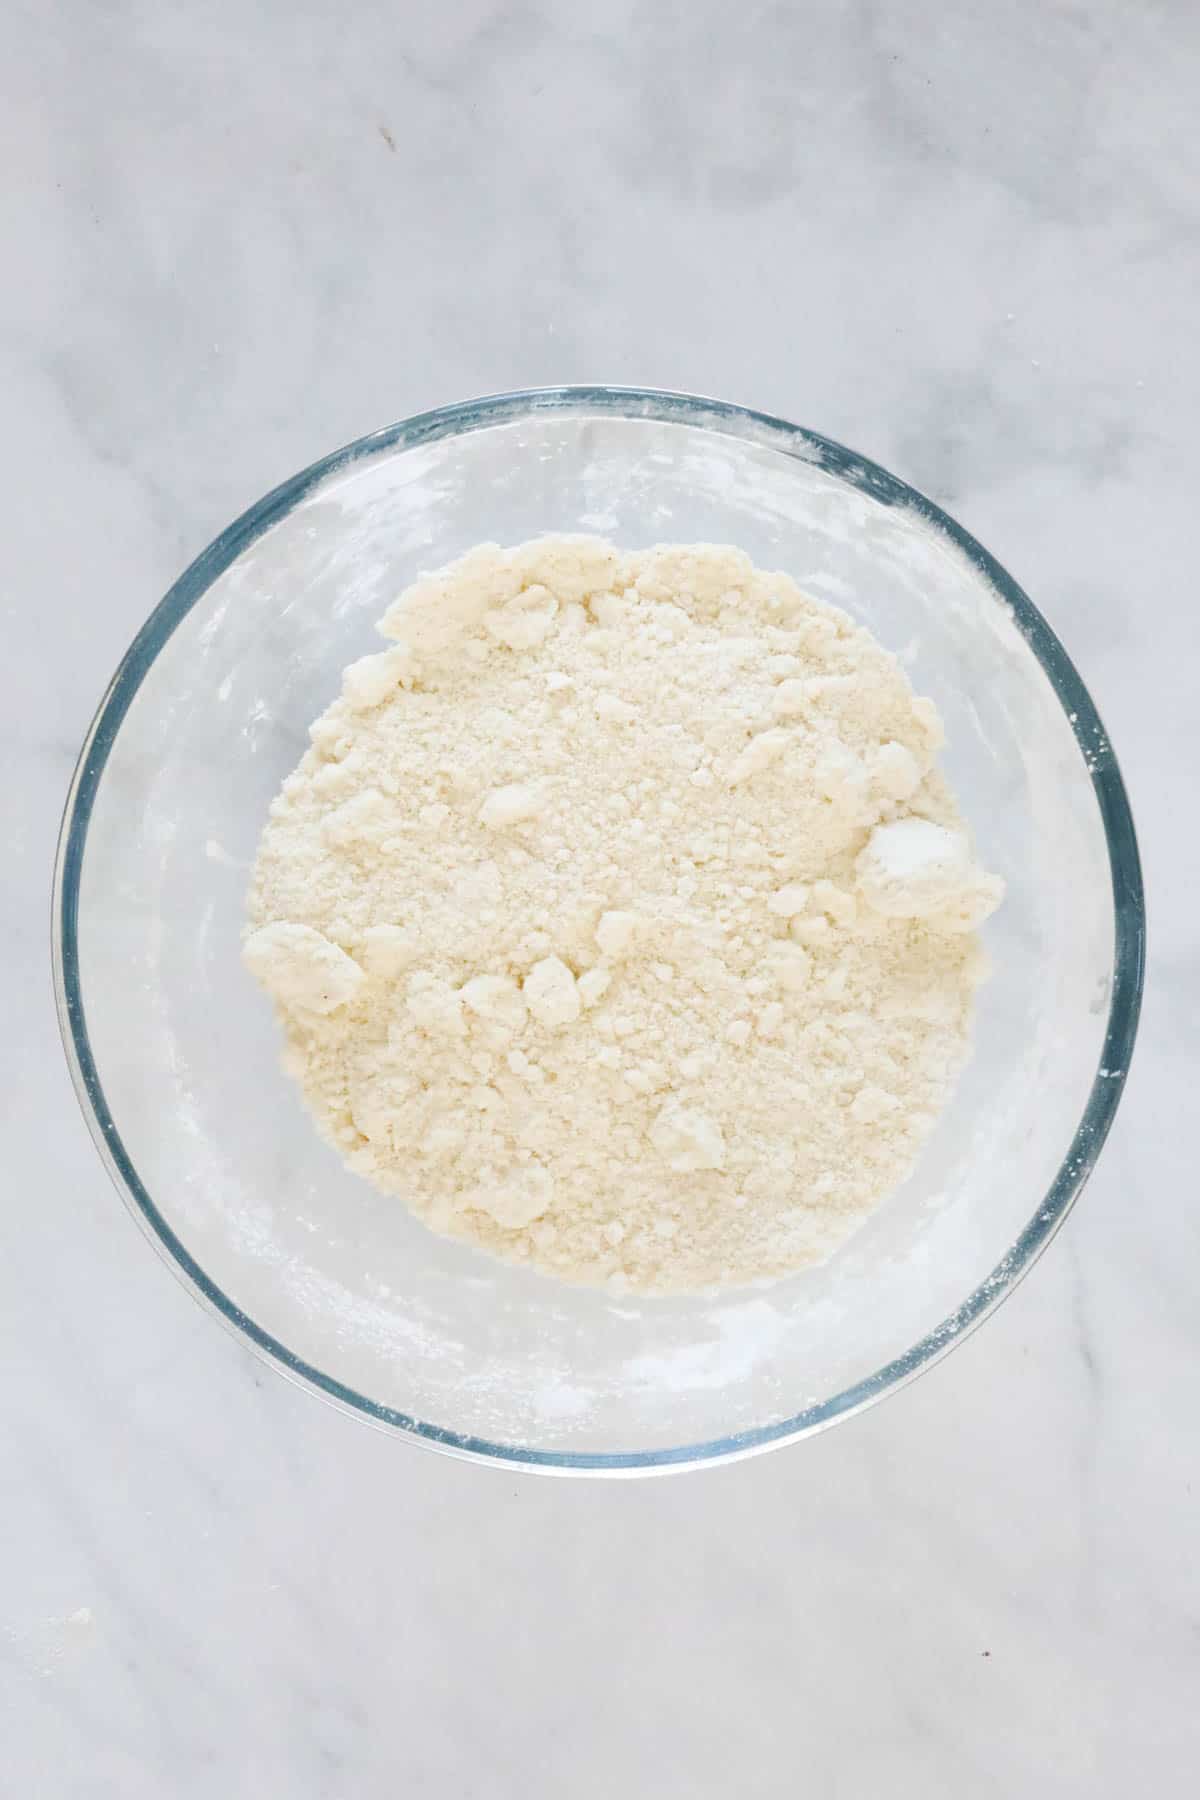
Step 3 – Add The Cheese
Add the grated cheese and mix through the flour and butter.

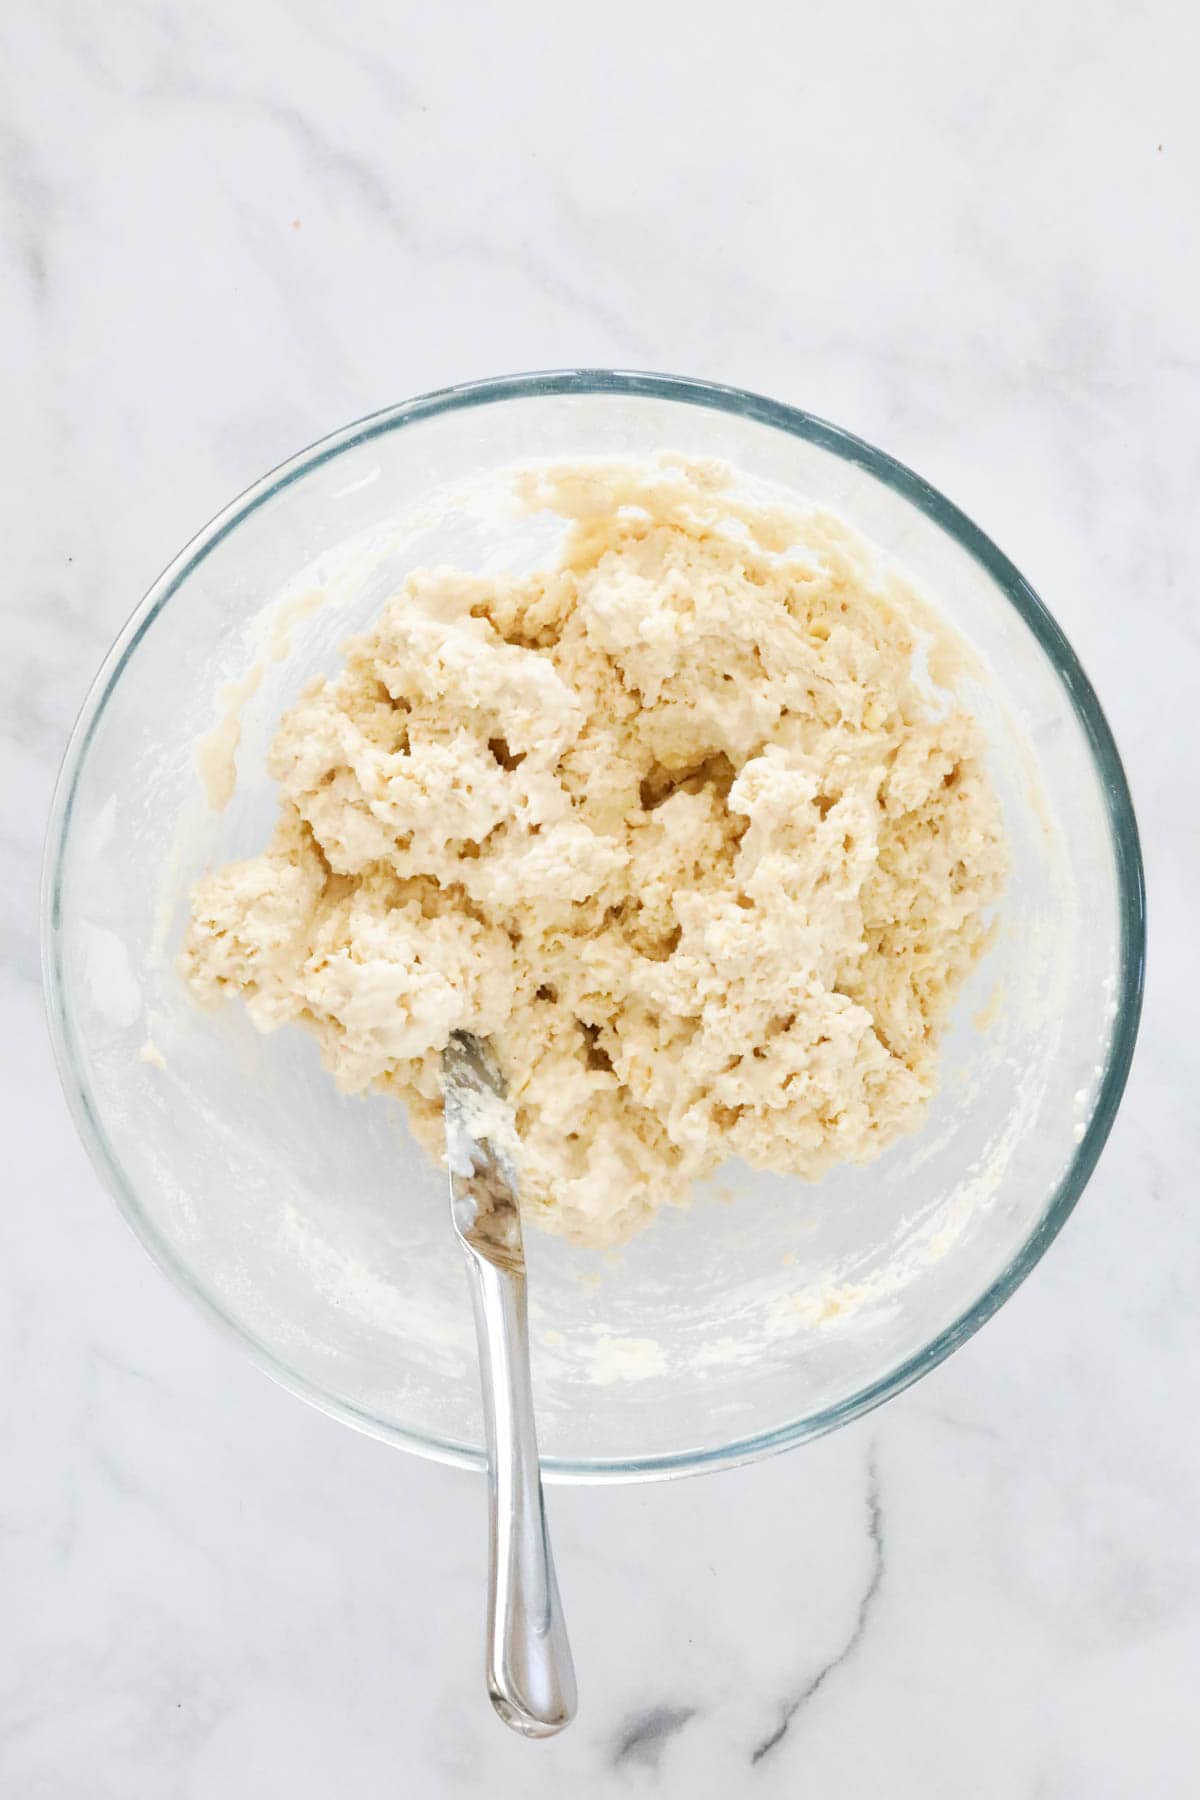
Step 4 – Add The Milk & Eggs
Whisk the milk and eggs in a bowl until combined. Pour this mixture into the dry ingredients and use a butter knife to fold it through until only just combined.
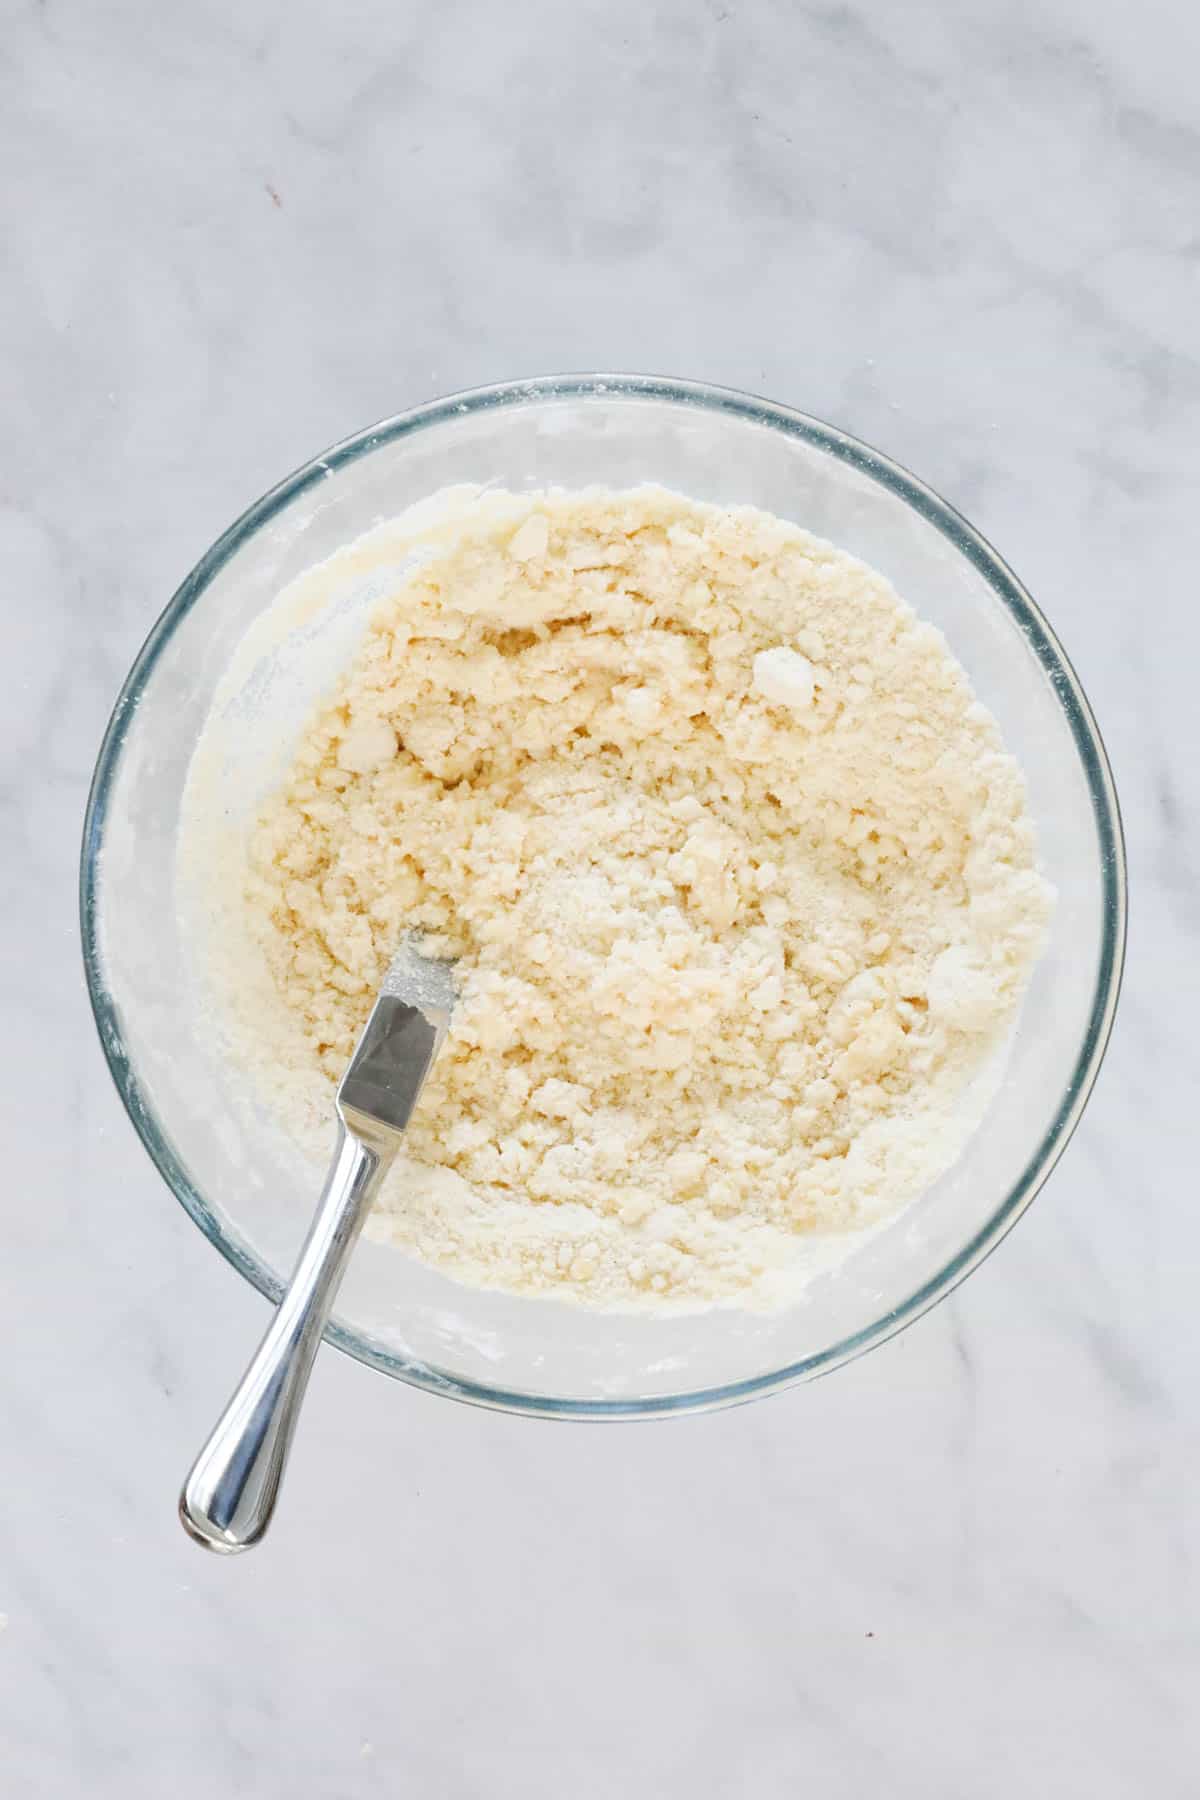
The mixture will be very sticky.
Step 5 – Cut Scones
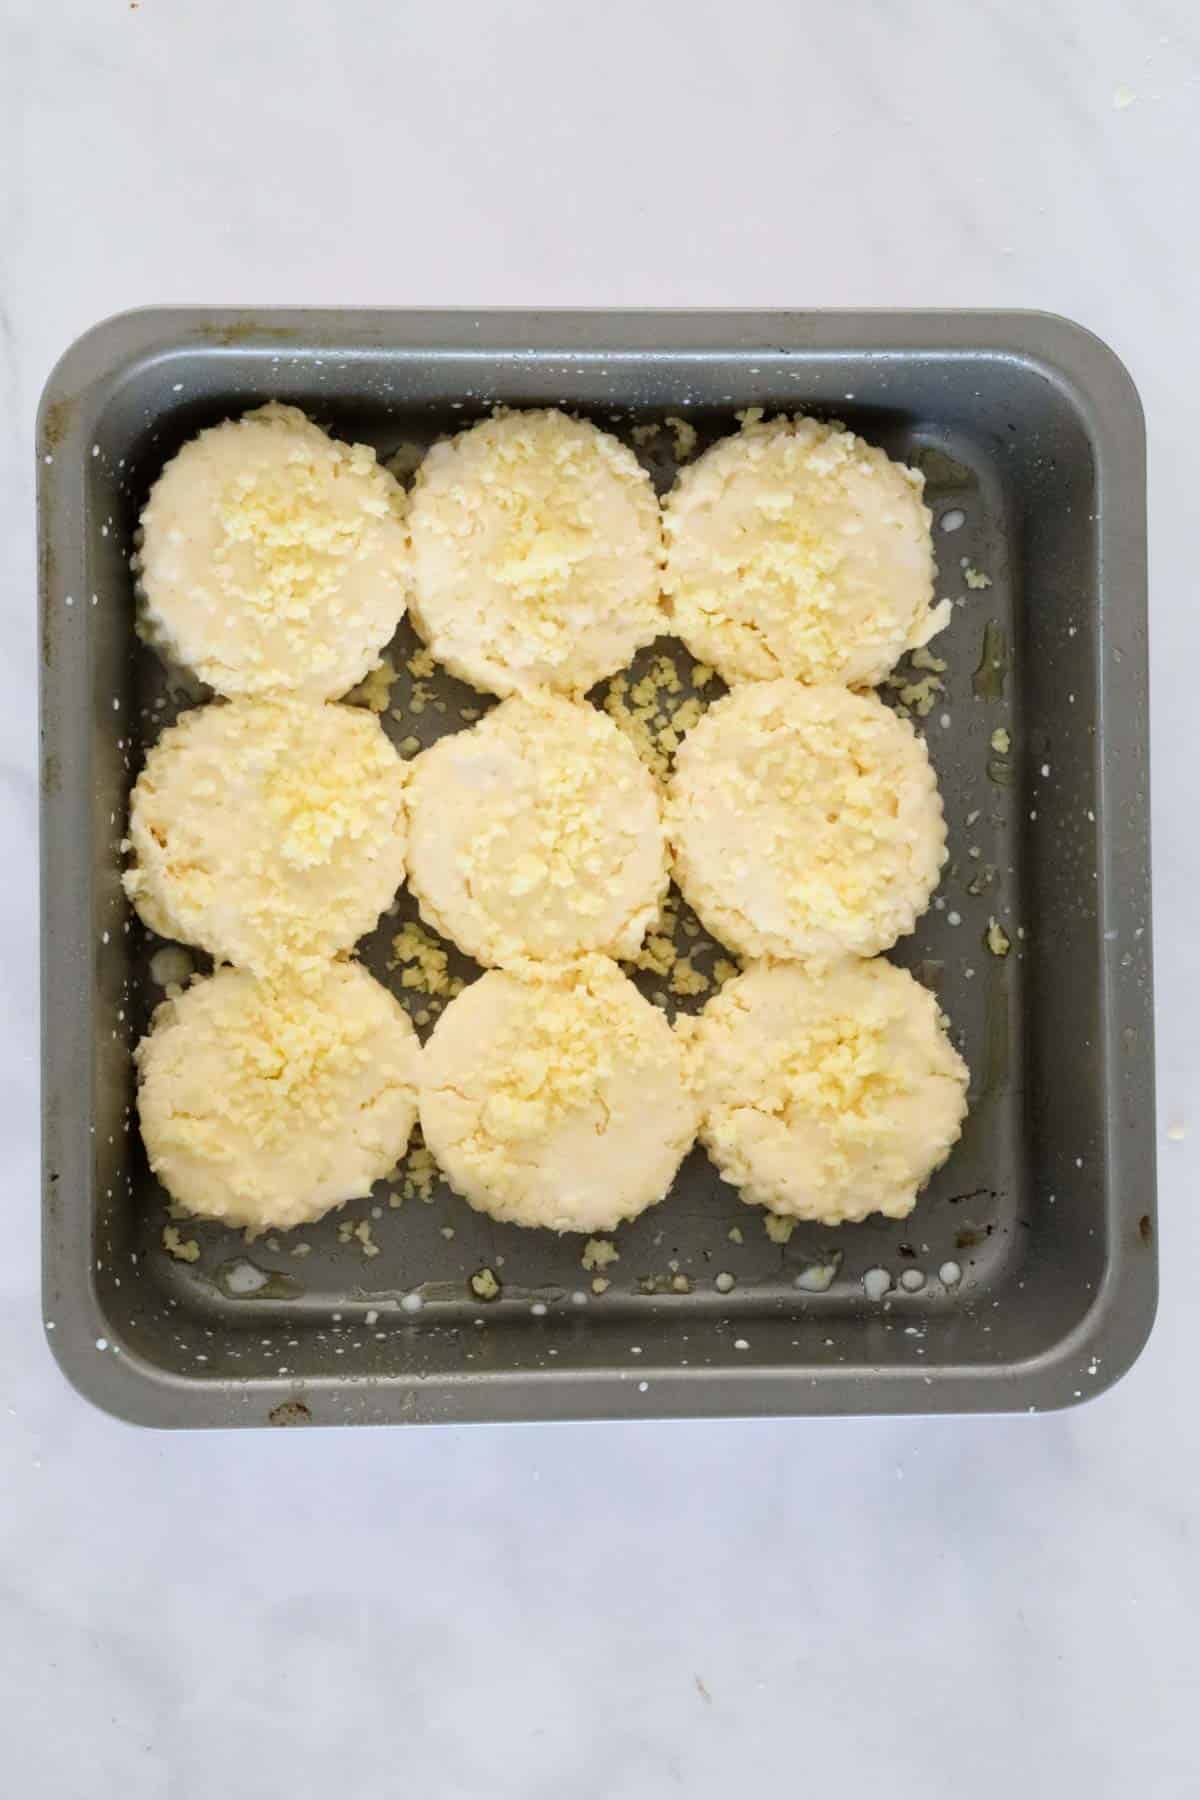
Place the dough onto a lightly floured board, and with lightly floured fingers, press the mixture down to a thickness of 5cm (do not over-work the dough).
Using a 6cm scone cutter, cut rounds from the middle, working outwards. Place scones into the lightly floured cake tin (make sure that your scones are gently pressing up against one another as it will help them to rise). Gently move the remaining dough together and cut out extra scones.
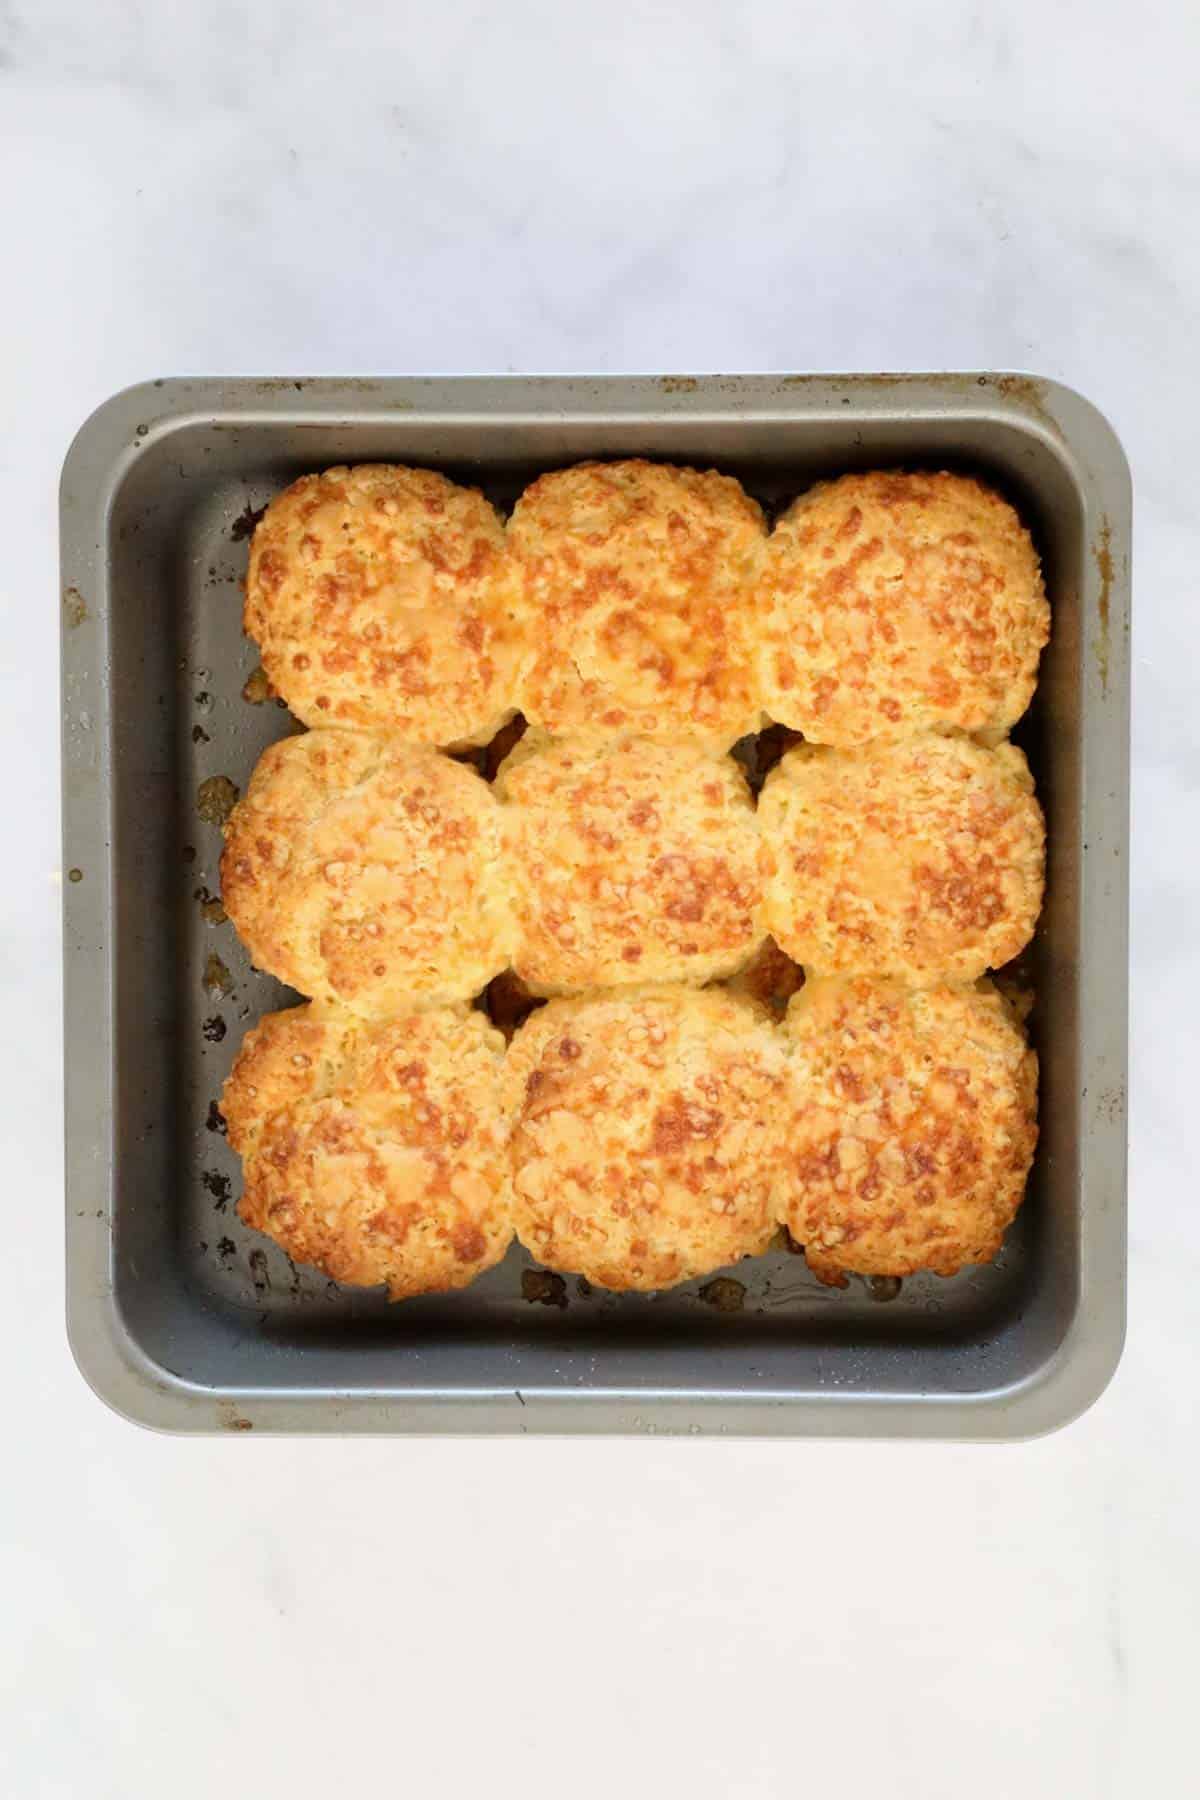
When you’ve used all of the dough, brush the tops of the scones with the extra milk, sprinkle with the extra grated cheese
Bake scones in the oven for 15-20 minutes.
Expert Tips
Scones have been popular forever, but here’s a few little tips to make sure your gluten free cheese scones are the very best!
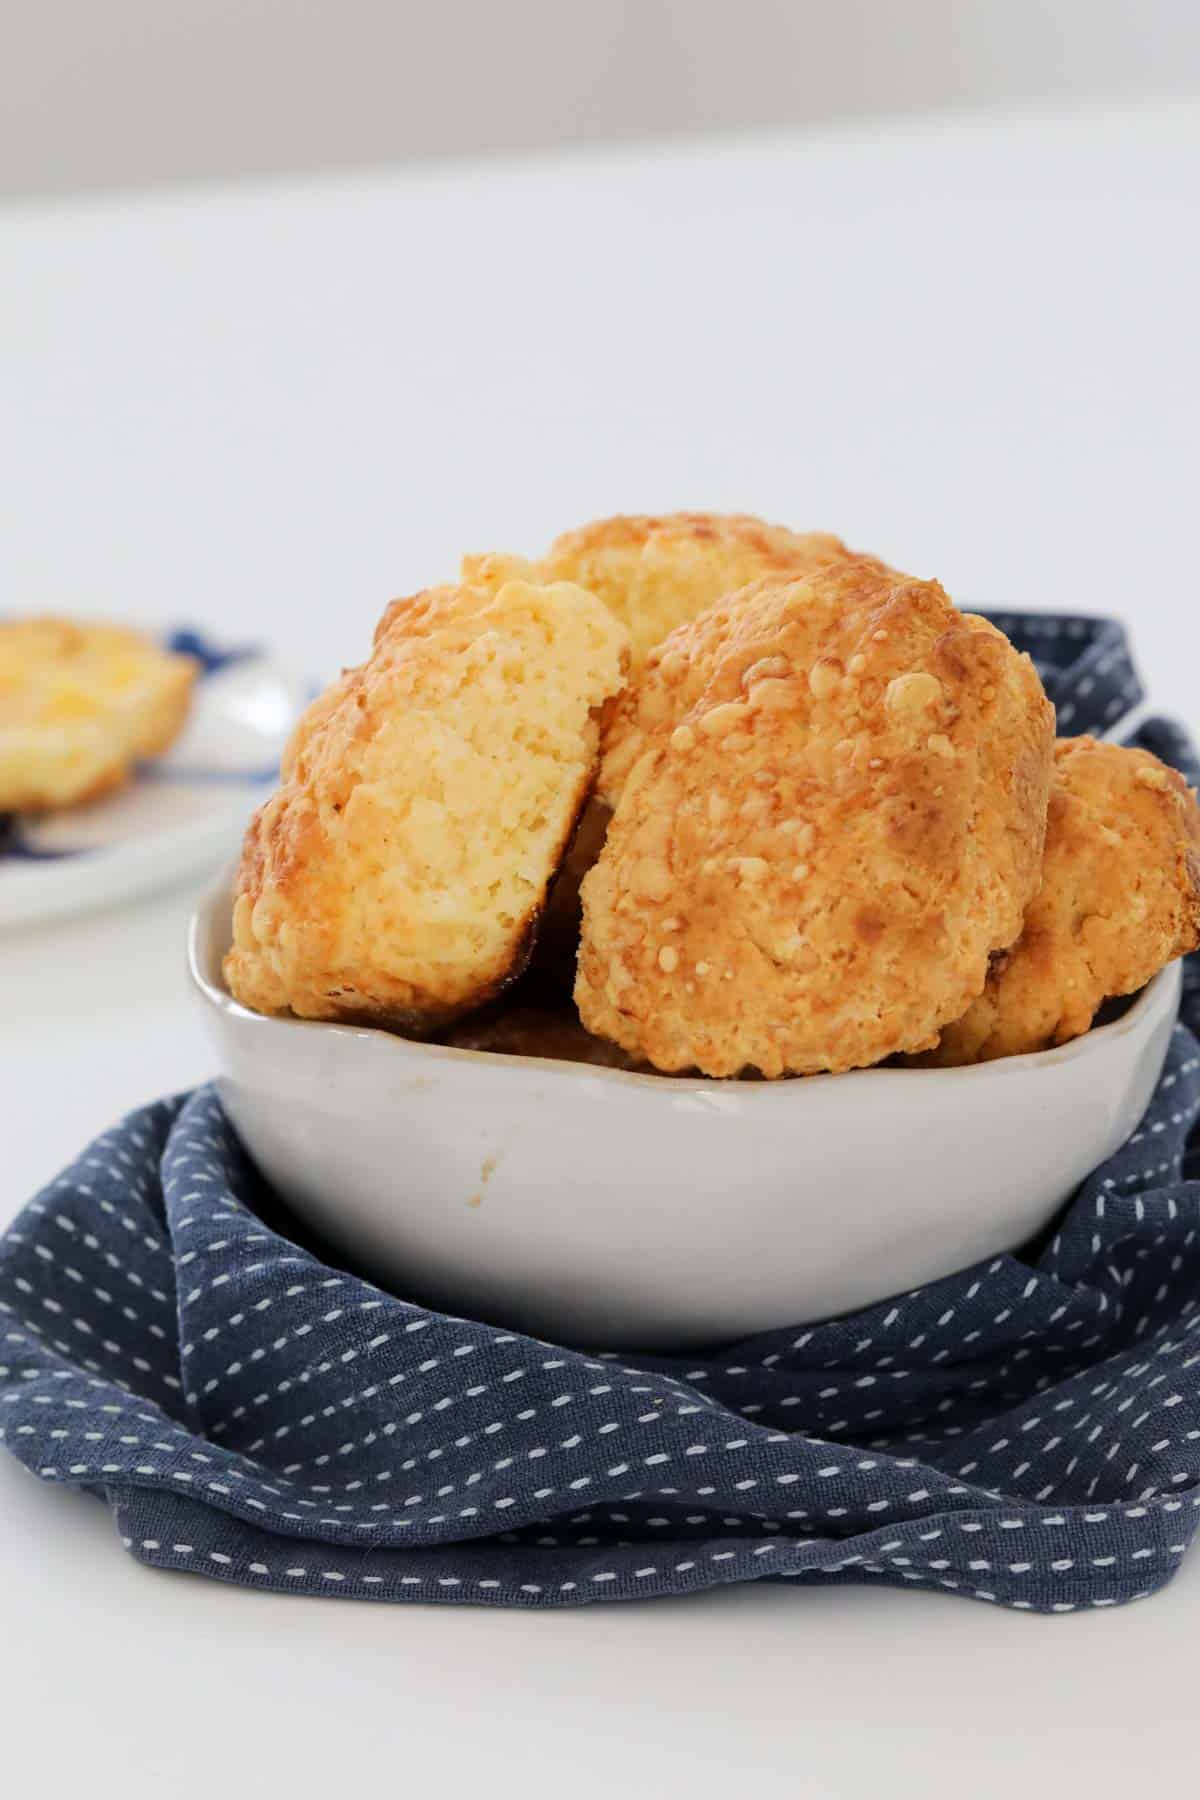
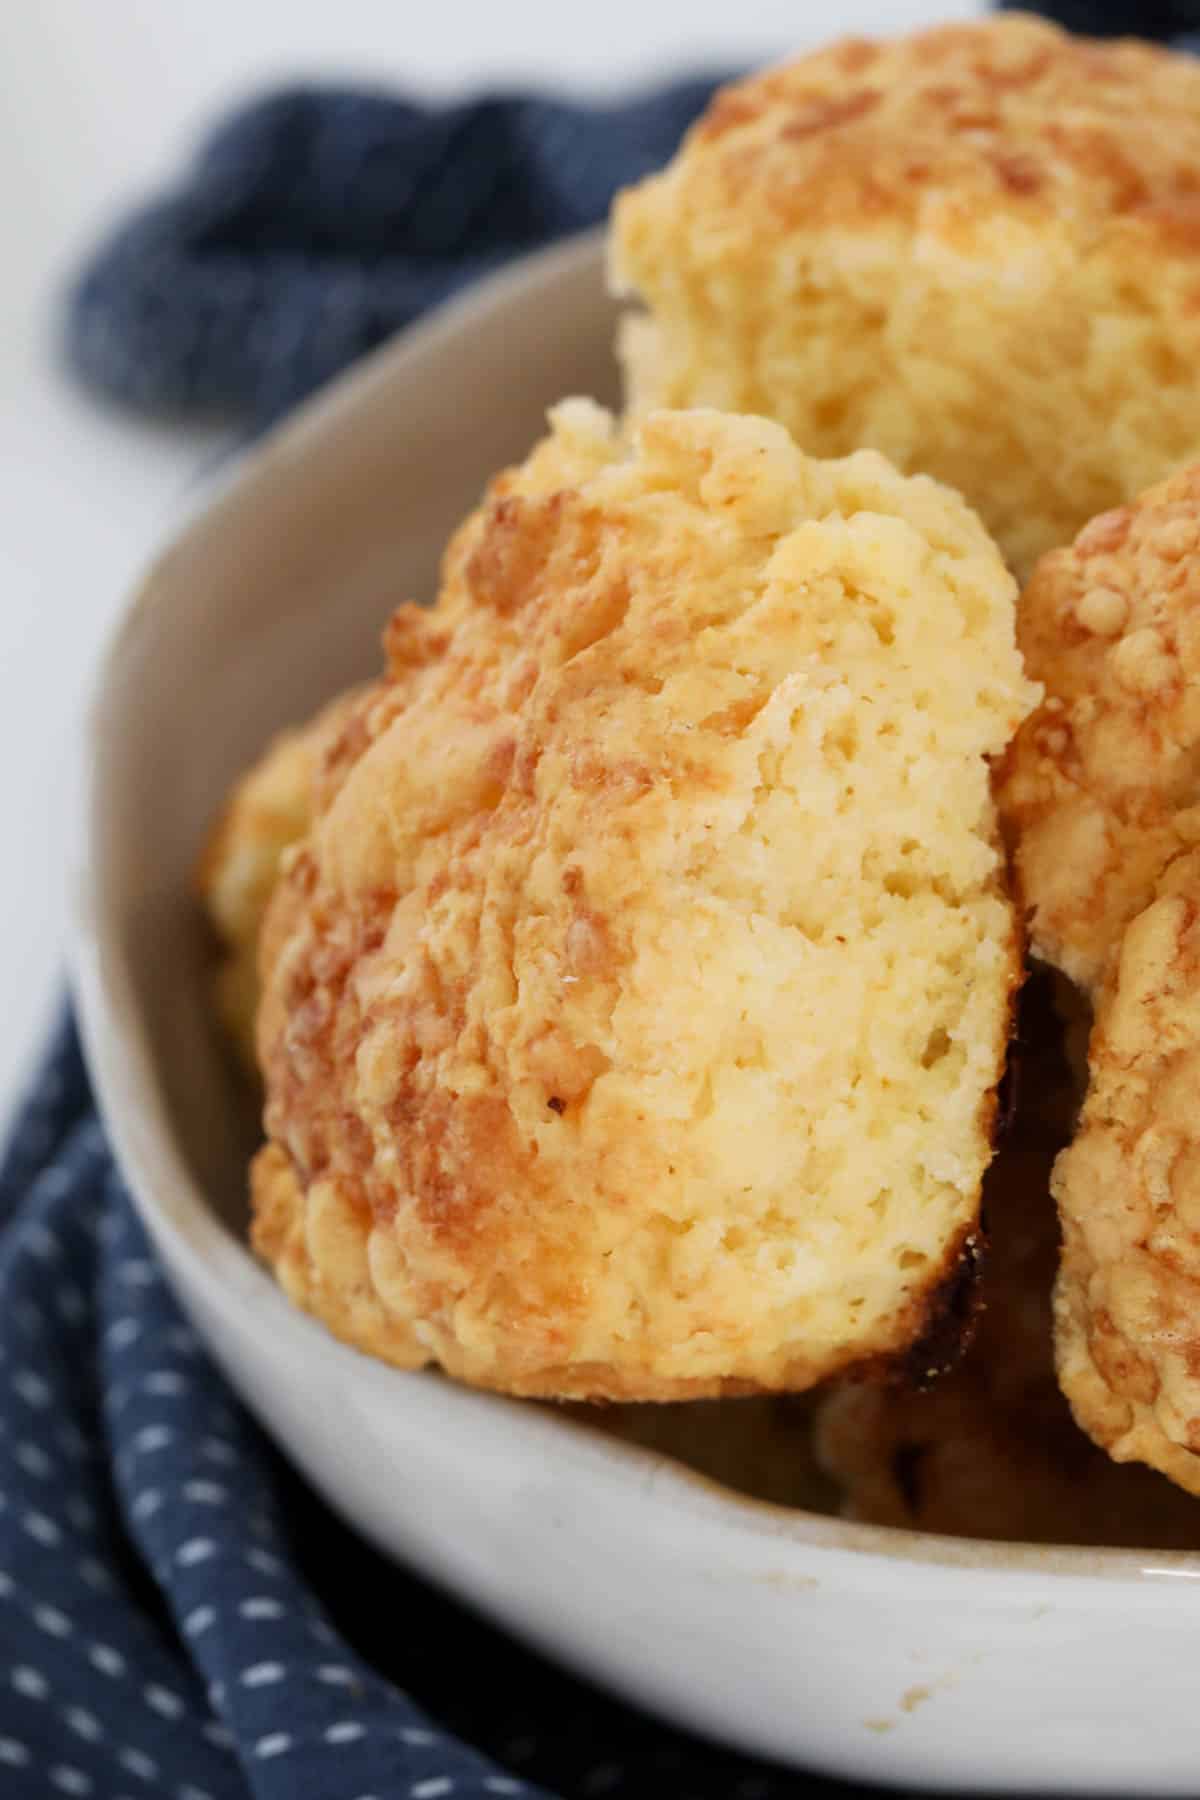
- Serves – 12 large 6cm scones or 18 small 3cm scones (if making smaller scones, reduce the cooking time accordingly).
- Don’t over-mix the dough – over-mixed dough leads to hard and tough scones. I recommend using a knife rather than a spoon to fold the wet mixture through.
- Cutting the scones – the less you touch the dough, the softer and fluffier your scones will be. Just pat the dough down gently with your fingertips and then cut rounds using a scone cutter. Once you’ve cut as many rounds as you can, gently push the dough together and cut the remaining rounds.
- Flour your cutter – dip your scone cutter lightly in flour between cuts to prevent the mixture sticking. If you don’t have a cutter, you can always just cut the dough with a knife.
- Use a hot oven – make sure your oven is pre-heated before cooking your scones. As gluten free cheese scones only take a few minutes to cook, you need that high temperature to give a golden crumbly crust on the outside, while keeping the inside beautifully soft and fluffy.
- Brush the scones with milk – this helps give them a beautiful golden top.
- Place the scones slightly touching in the tin – this helps them to rise.
- Storing scones – gluten free cheese scones are best served warm on the day that they’re cooked but will last up to 2-3 days (reheat them slightly in the air fryer or oven before serving). Alternatively, you can freeze them for up to 3 months.
FAQs
Xanathan gum is often used in gluten-free baking as it helps the starches combine and improves the texture, rise and shelf-life of gluten-free baking.
Gluten-free cakes and breads have a reputation for being dry and crumbly and therefore many bakers add a small quantity of xanthan gum to replicate the function of gluten in GF baking products.
For those with a gluten intolerance, eating products containing gluten can set off a destructive immune and often inflammatory response. This mostly affects the stomach and bowel, but can also include other symptoms such as fatigue and headaches.
Gluten is a type of protein found in wheat, rye, barley, and other grains, and therefore it’s common in foods such as bread, pasta, pizza, biscuits, cakes and cereal.
Surprisingly though, it is also found in many other foods that you most likely wouldn’t suspect, such as beer and meat substitutes!
This makes it really important to check the ingredients list for any mention of wheat, barley, rye, or malt products on the ingredients label, and avoid these products if you are maintaining a gluten free diet.
Yes, you can still indulge in the most delicious desserts as well, all completely guilt and gluten free!
WANT EVEN MORE DELICIOUS RECIPES? Subscribe to my newsletter or follow along on Facebook or Instagram. And if you love baking, then please come and join my Facebook cooking club group or subscribe to my YouTube channel.

Gluten Free Cheese Scones
The BEST EVER Gluten Free Cheese Scones made from just a handful of basic pantry ingredients.
Print
Pin
Rate
Servings: 12 scones
Calories: 315kcal
Prevent your screen from going dark
Instructions
Preheat oven to 200 degrees celsius (fan-forced). Lightly flour a 20cm square cake tin and set aside.
- Sift the self raising flour, baking powder, xanthan gum, salt and cayenne pepper into a large bowl. If using a Thermomix: Place the self raising flour, baking powder, xanthan gum, salt and cayenne pepper into the Thermomix bowl – mix for 5 seconds, Speed 8.
- Add the butter and rub it through with your fingers until the mixture resembles breadcrumbs. Add the grated cheese and mix to combine. If using a Thermomix: Add the butter and grated cheese and mix for 8 seconds, Speed 6.
- Whisk the milk and eggs in a bowl until combined. Pour in the milk/egg mixture and use a butter knife to fold it through until only just combined (the mixture will be very sticky).If using a Thermomix: Pour in the milk and eggs and knead for 20 seconds. Scrape down the sides of the bowl and mix for a further 10 seconds.
- Place the dough onto a lightly floured board.With lightly floured fingers, press the mixture down to a thickness of 5cm (do not over-work the dough).
Using a 6cm scone cutter, cut rounds from the middle working outwards and place into the lightly floured cake tin (make sure that your scones are gently pressing up against one another as it will help them to rise).
Gently move the remaining dough together and cut out extra scones.
When you’ve used all of the dough, brush the tops of the scones with the extra milk, sprinkle with the extra grated cheese and place into the oven for 15-20 minutes.
- The scones will be ready when they’re golden on top and sound hollow when tapped. Serve warm with butter. Note: the time it takes for the scones to cook will depend on their size and also on your oven. Continue cooking the scones until their crunchy on the outside and soft and crumbly on the inside.
Notes
- Serves – 12 large 6cm scones or 18 small 3cm scones (if making smaller scones, reduce the cooking time accordingly).
- Don’t over-mix the dough – over-mixed dough leads to hard and tough scones. I recommend using a knife rather than a spoon to fold the mixture through.
- Cutting the scones – the less you touch the dough, the softer and fluffier your scones will be. Just pat the dough down gently with your fingertips and then cut rounds using a scone cutter. Once you’ve cut as many rounds as you can, gently push the dough together and cut the remaining rounds.
- Flour your cutter – dip your scone cutter lightly in flour between cuts to prevent the mixture sticking. If you don’t have a cutter, you can always just cut the dough with a knife.
- Use a hot oven – make sure your oven is pre-heated before cooking your scones. As they only take a few minutes to cook, you need that high temperature to give a golden crumbly crust on the outside, while keeping the inside beautifully soft and fluffy.
- Brush the scones with milk – this helps give them a beautiful golden top.
- Place the scones slightly touching in the tin – this helps them to rise.
- Storing scones – Scones are best served on the day that they’re cooked but will last up to 2-3 days (you might like to reheat them slightly if you’re not serving them on the day). Alternatively you can freeze them for up to 3 months.
Nutrition
Calories: 315kcal | Carbohydrates: 47g | Protein: 9g | Fat: 10g | Saturated Fat: 6g | Polyunsaturated Fat: 1g | Monounsaturated Fat: 2g | Trans Fat: 0.2g | Cholesterol: 26mg | Sodium: 114mg | Potassium: 245mg | Fiber: 2g | Sugar: 1g | Vitamin A: 308IU | Vitamin C: 0.03mg | Calcium: 165mg | Iron: 3mg


:max_bytes(150000):strip_icc()/Serious-Eats_2023MPP_Greg-DuPree_KababHalla_5851-25770082a526461689128fa66cd99083.jpg "When to Use Which and Why")