


Create a stunning fall rag wreath with our easy DIY tutorial! Embrace the autumn season with this simple craft. Learn how to craft a beautiful wreath using scraps of fabric in just minutes. Get inspired and make your home warm and welcoming with this charming fall decor idea.

Fall Rag Wreath Tutorial
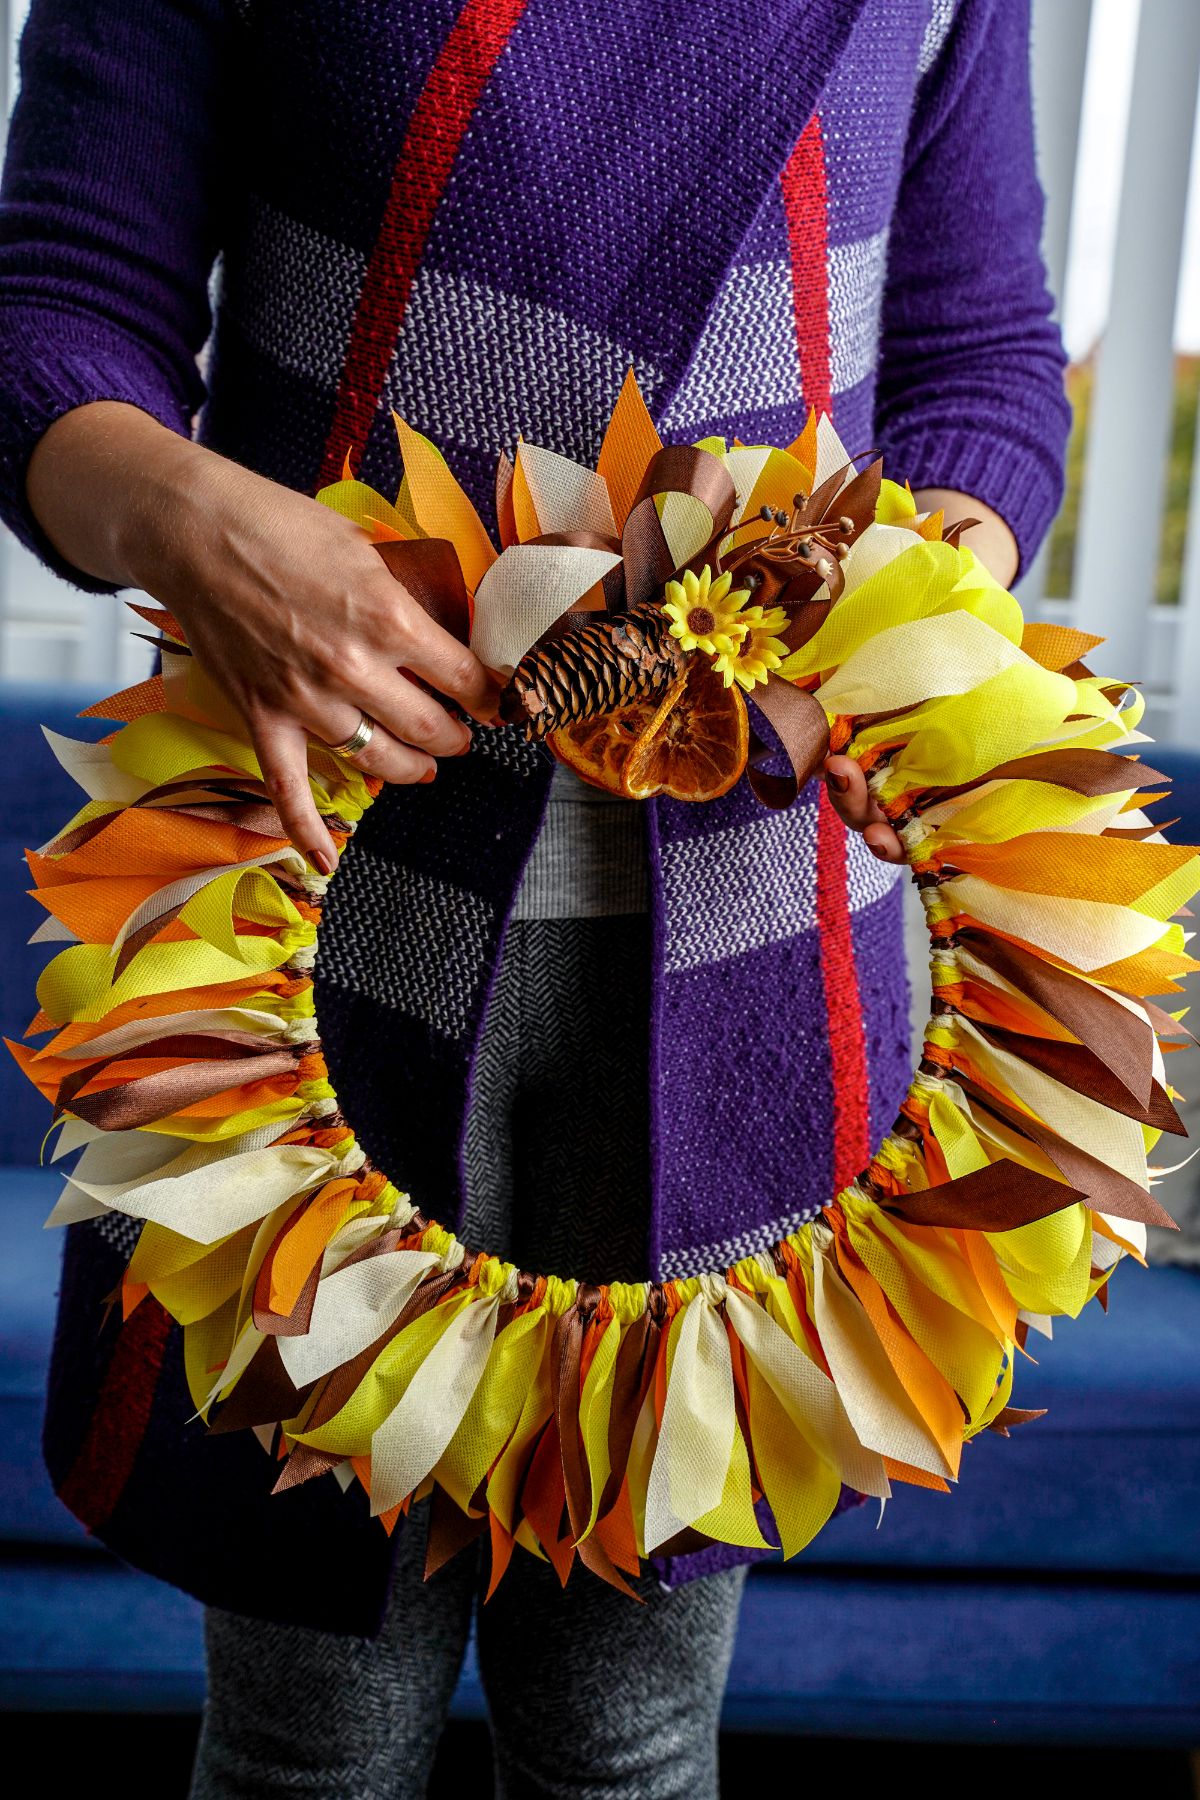
Celebrate the festive spirit with our fall rag wreath craft! This delightful DIY project is not only a wonderful way to embrace the season but also an opportunity to easily create a charming piece of decor.
Plus, you’ll be delighted to know that it involves recycling and upcycling materials! By using old rags and fabric scraps, you’ll be giving new life to forgotten materials while reducing waste.
Unleash your creativity and follow our step-by-step instructions to design a wreath that will add a warm, welcoming touch to your home’s autumn ambiance. Need more wreaths for the fall season? Check out this huge list of DIY fall wreaths for inspiration.
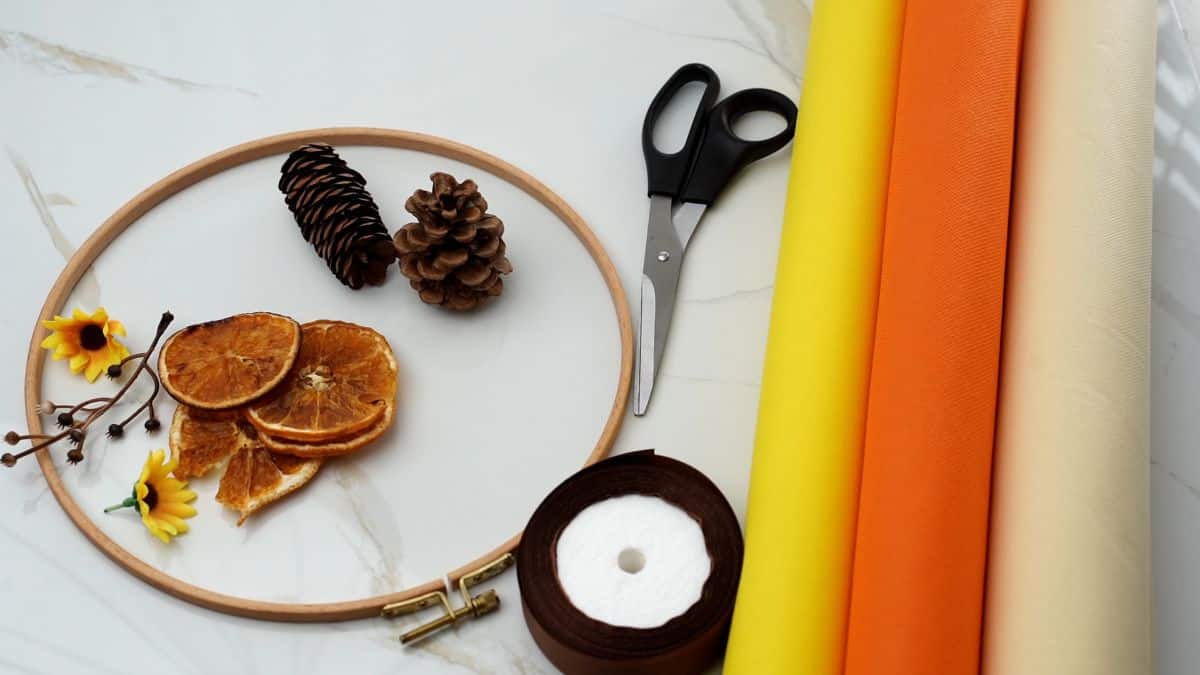
Supplies Needed
You can probably look to your craft supply closet to find everything needed for making this wreath come to life. This is for inspiration, but you can use different items to customize your fall wreath.
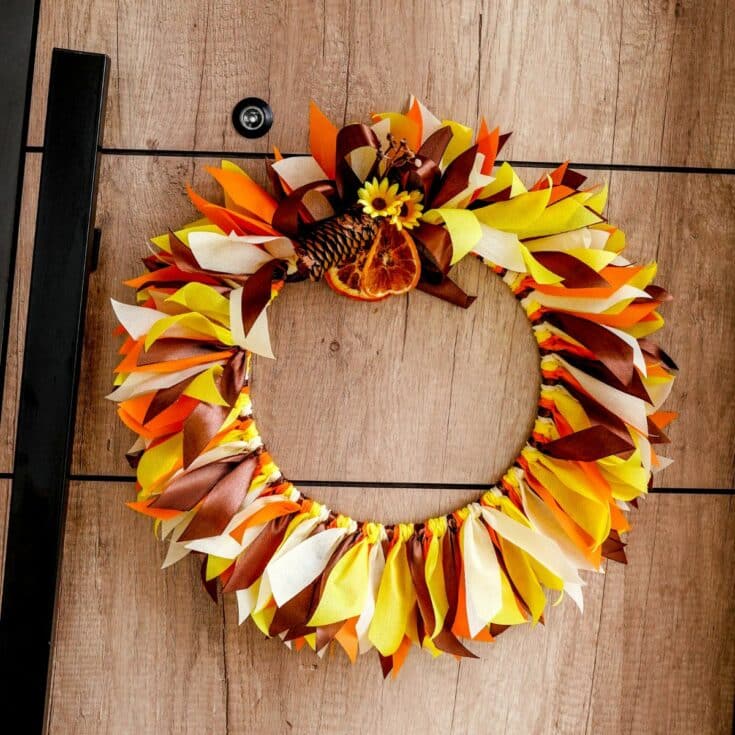
How to Make a Fall Rag Wreath
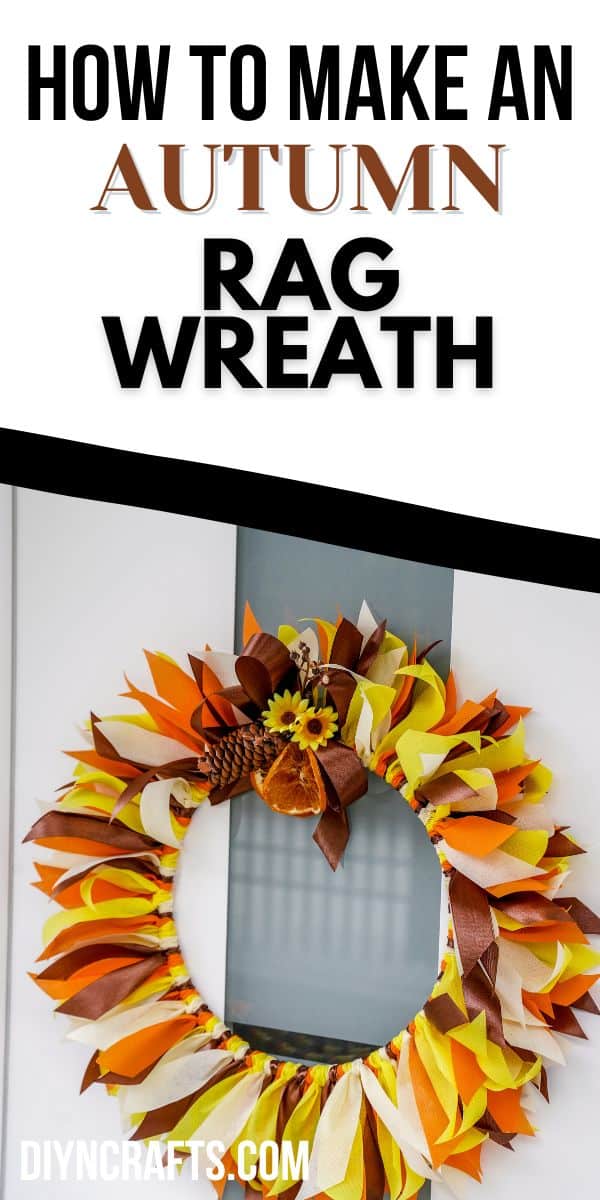
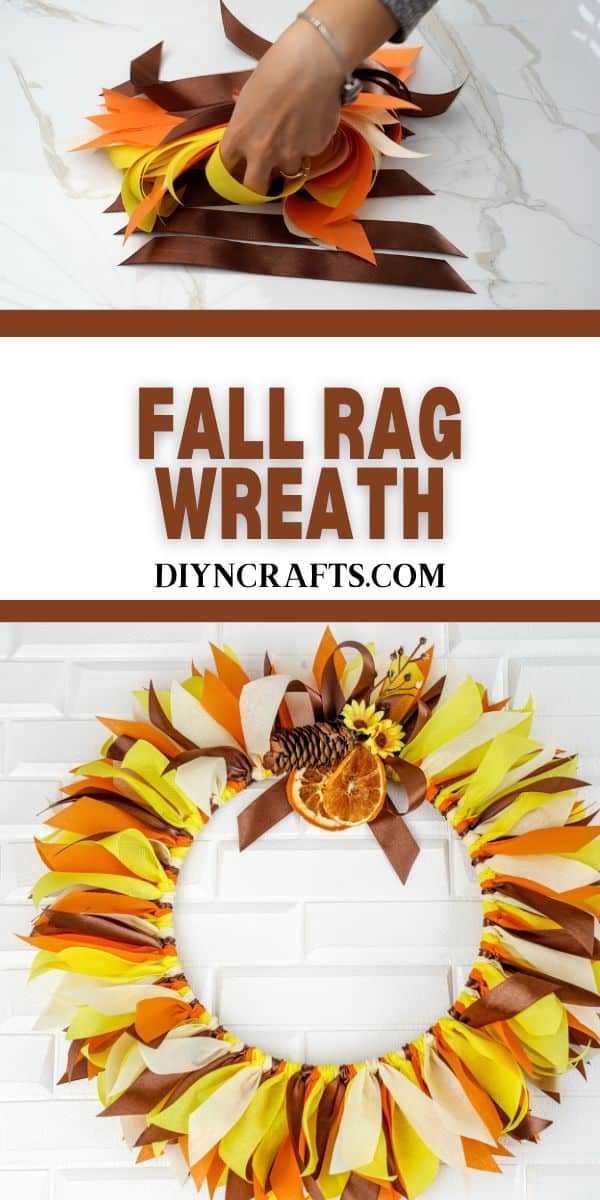
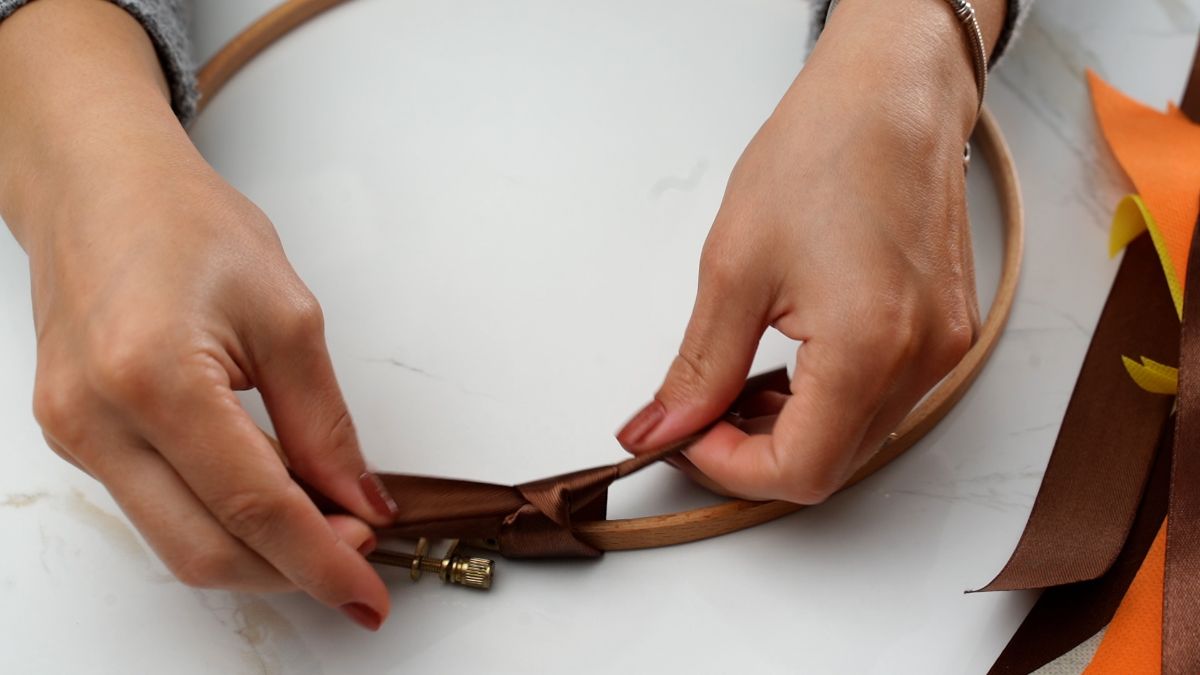
Begin by cutting the fabric and ribbon. Start with cutting the brown ribbon into 5″-6″ strips. They should be long enough to tie around the embroidery hoop with some hanging on both sides.
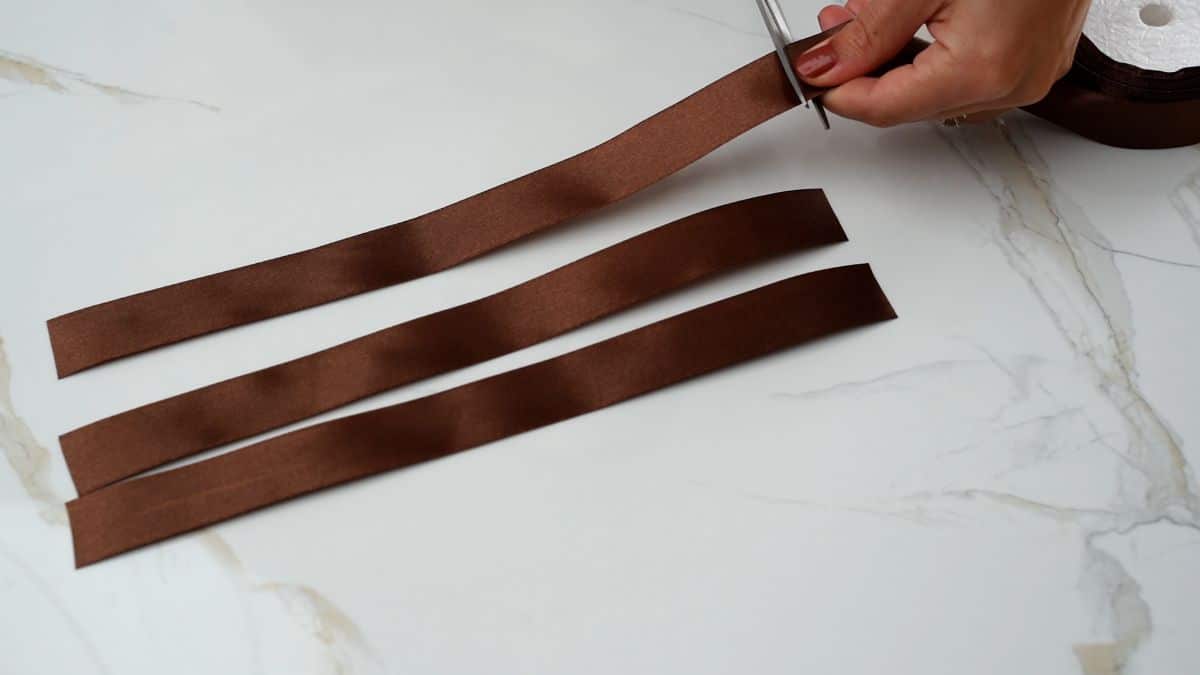
Do the same things with the white, orange, and yellow fabric. Cut strips that are around 1″ wide and 5″ to 6″ long. Continue until you have at least 25 of each color. Depending on the size of the hoop, you may need more or less.
Similar Project: 15 Things You Must Do To Winterize Your Garden
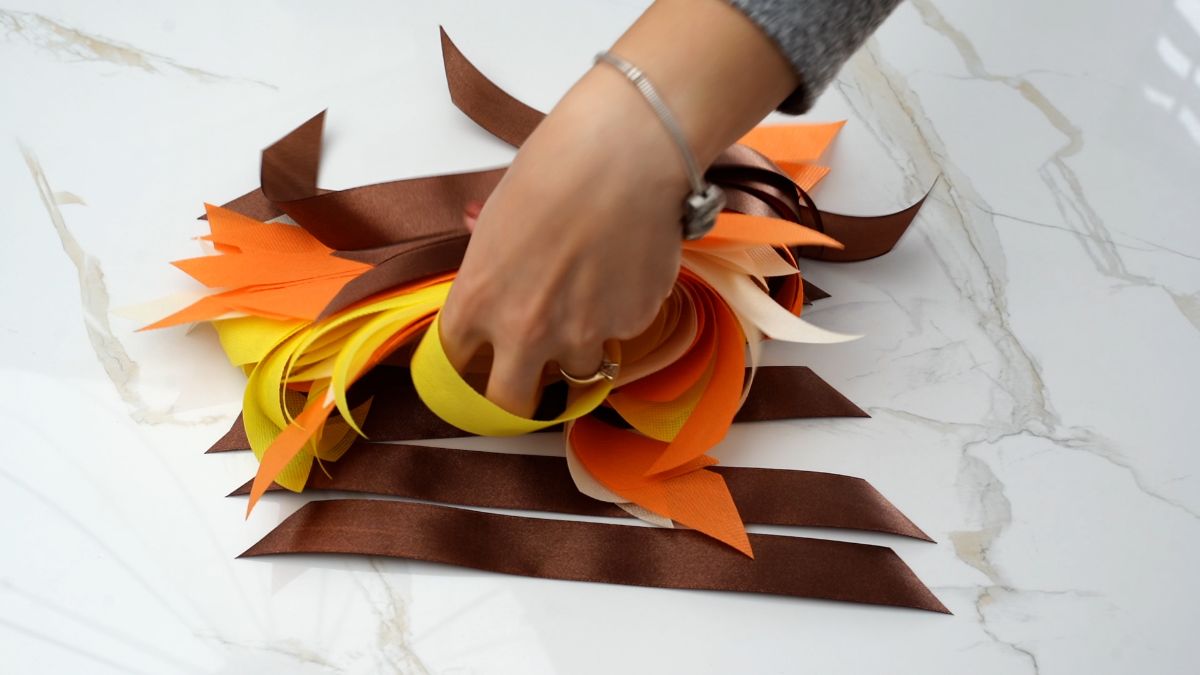
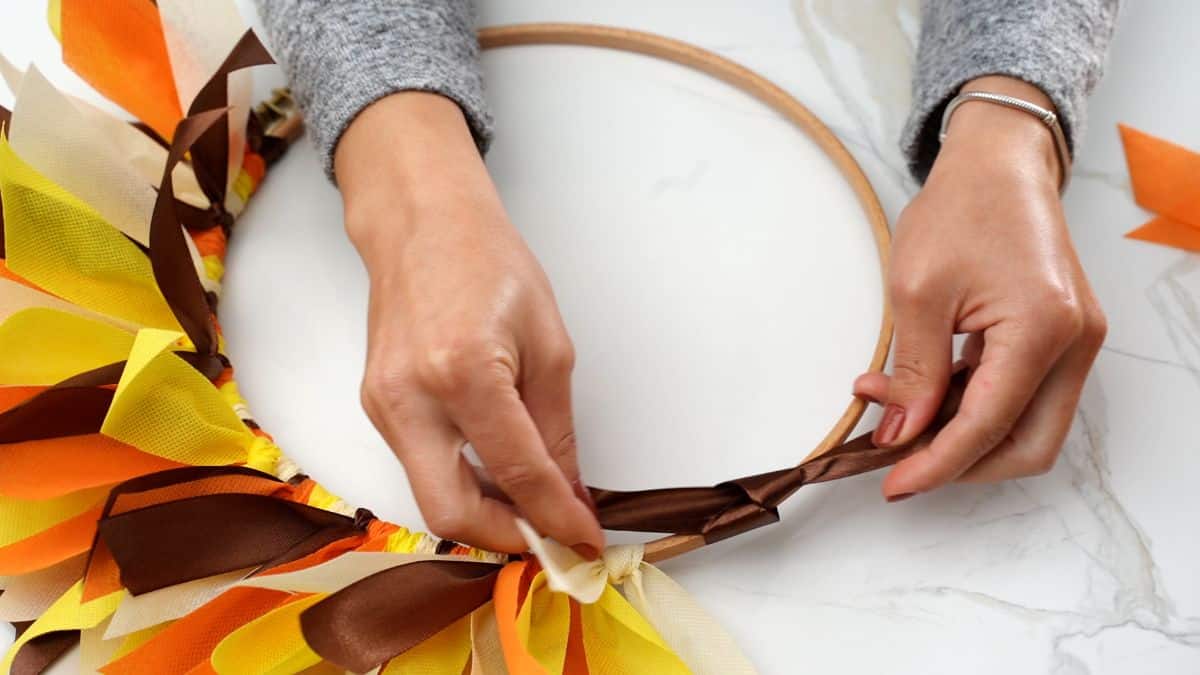
No, you will start at the top, and begin tying the ribbon and fabric around the embroidery hoop. Alternate the colors so there is a variety of the mixture.
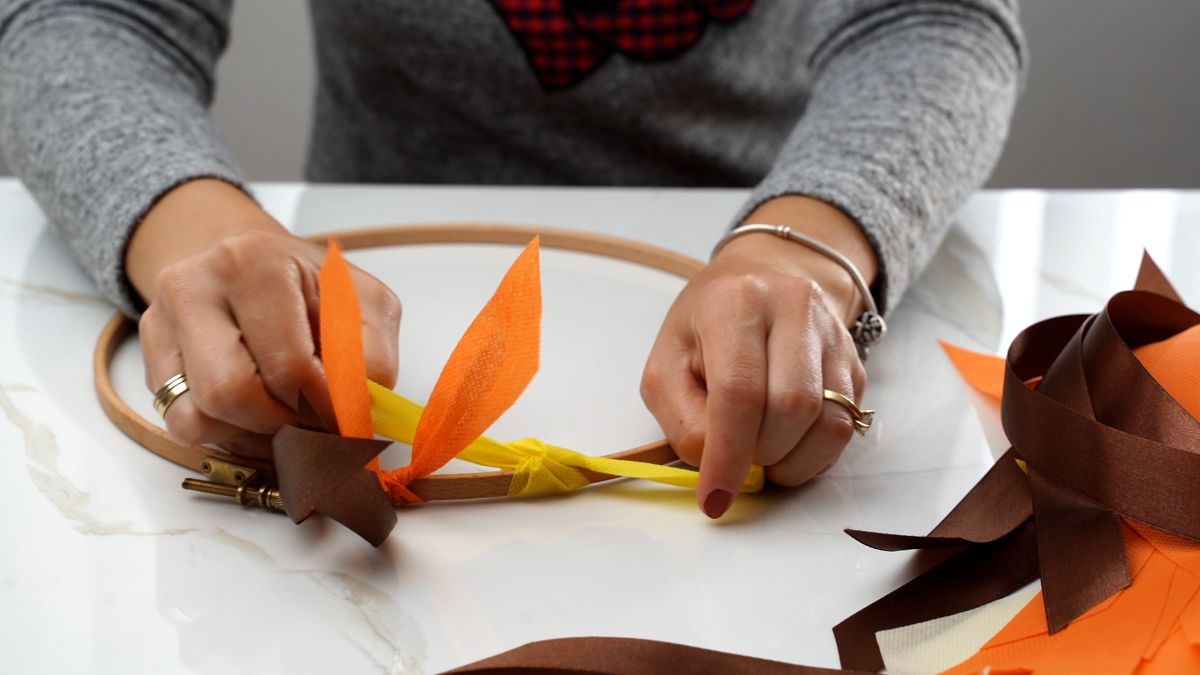
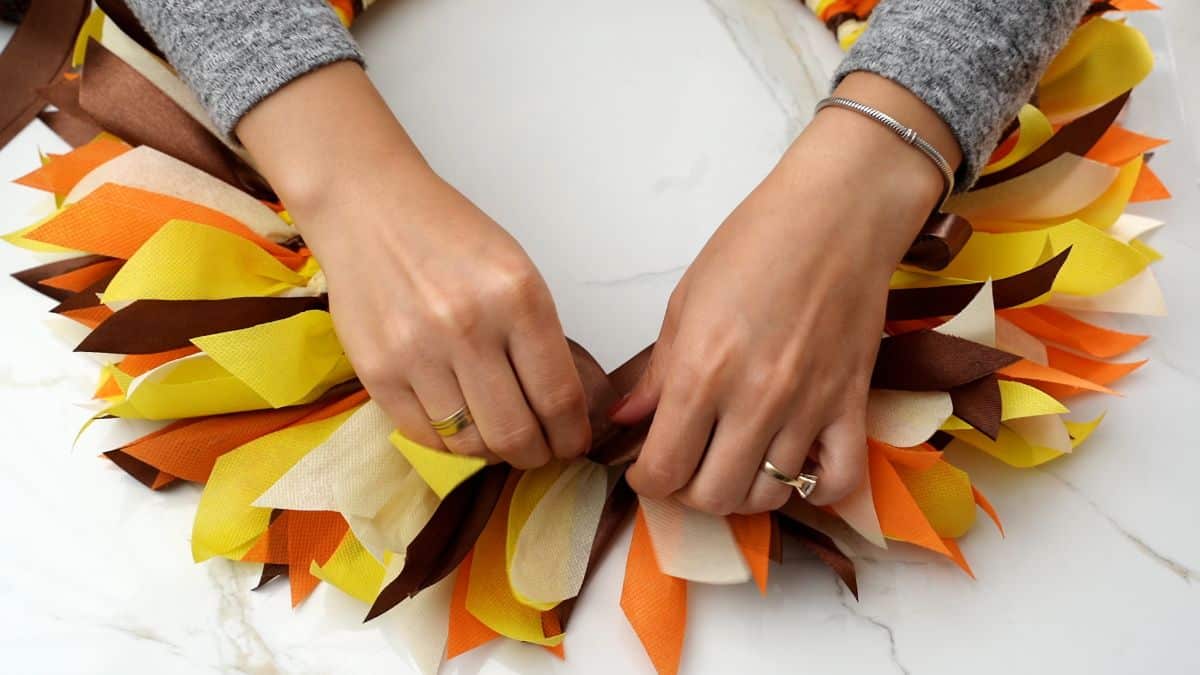
Continue this process until you are happy with the look of the wreath.
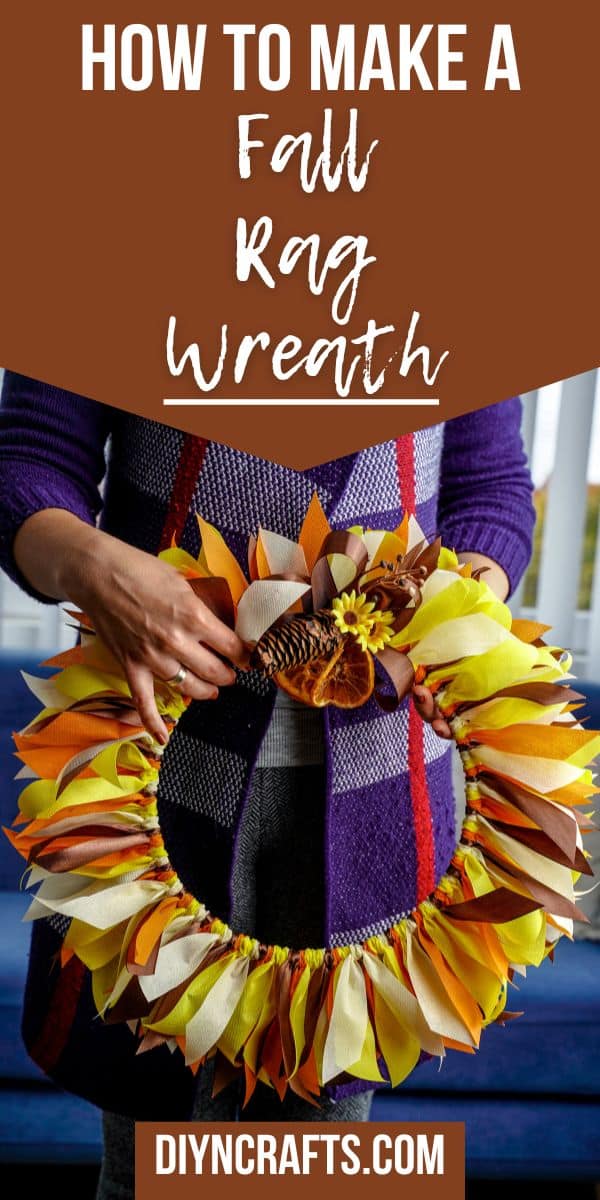
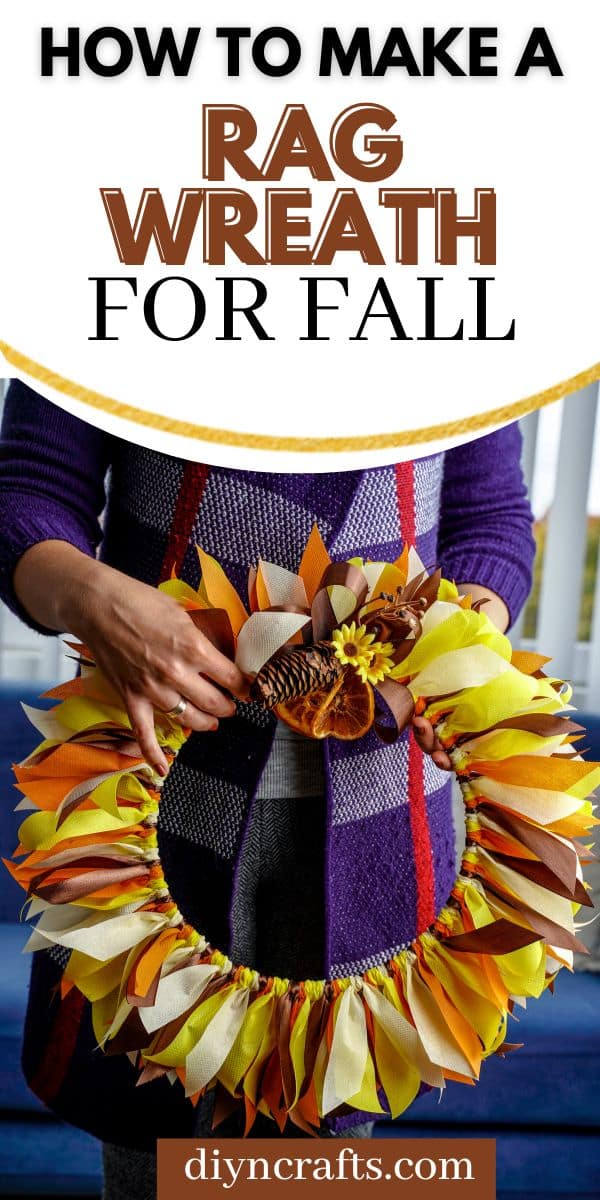
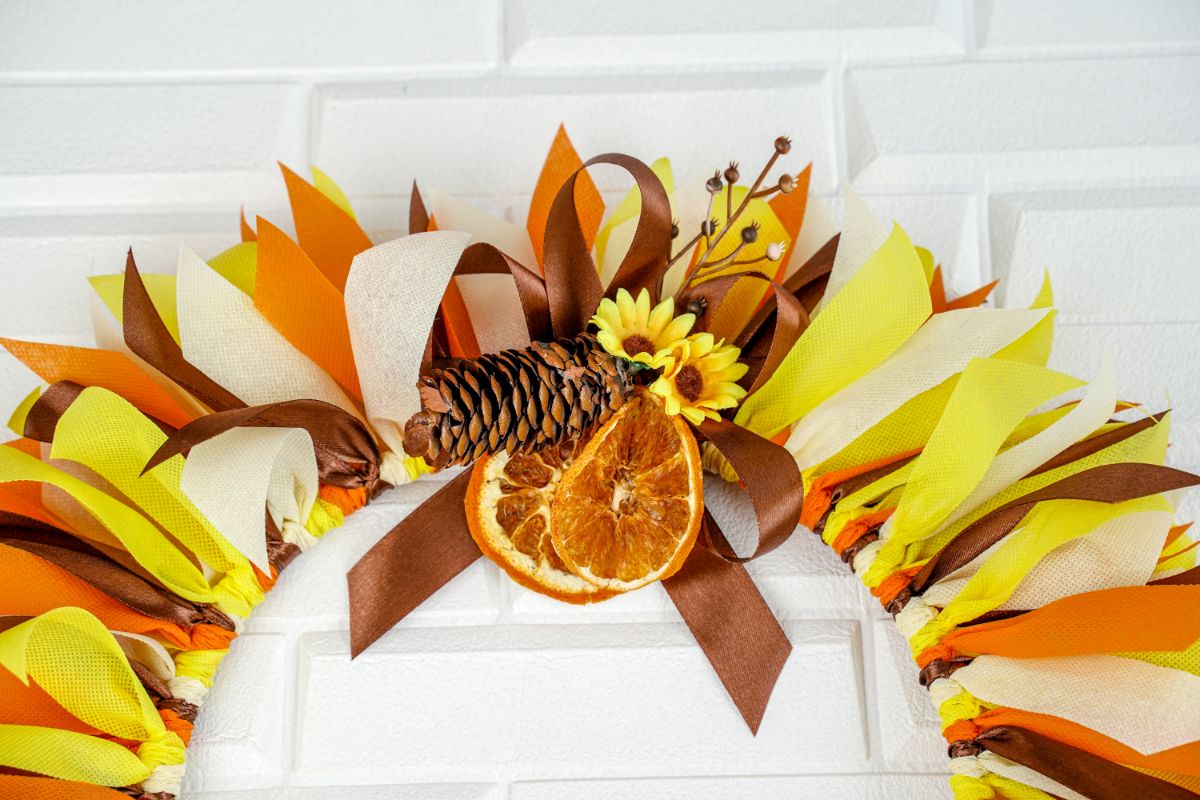
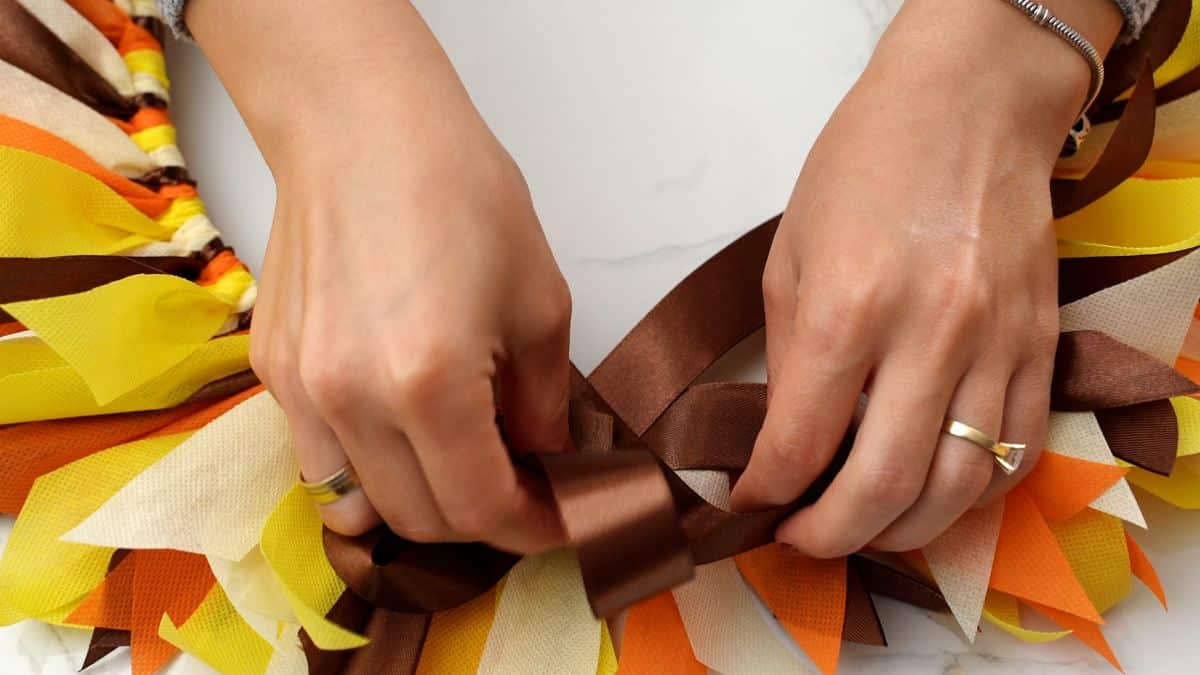
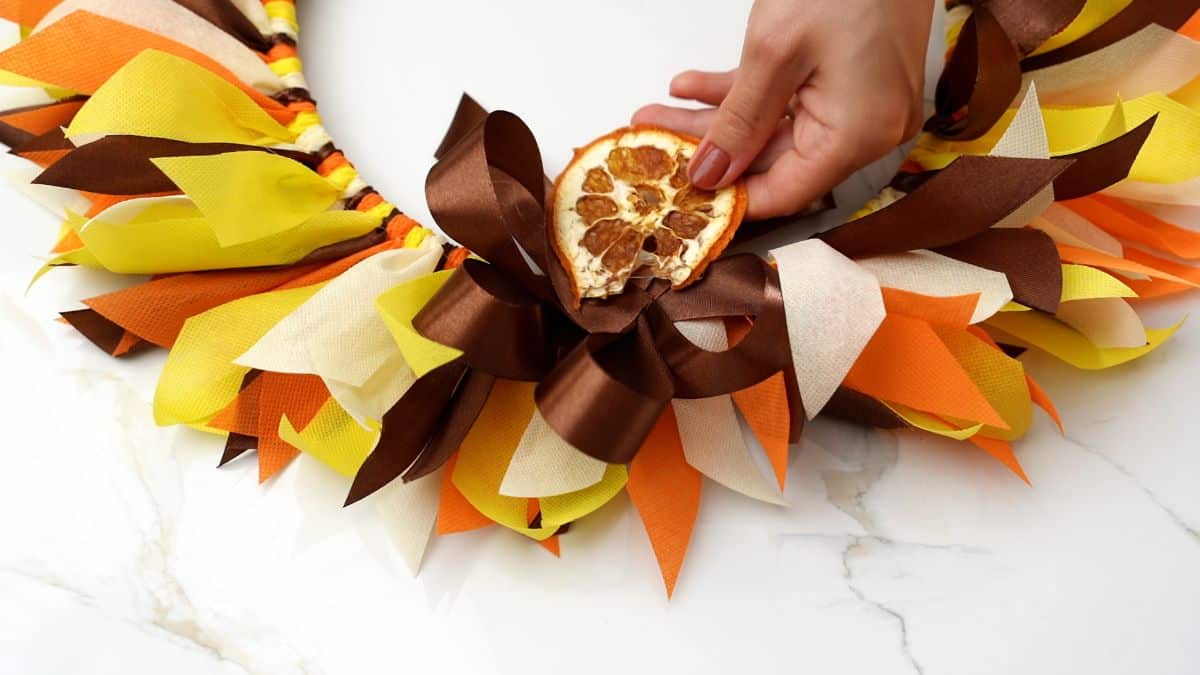
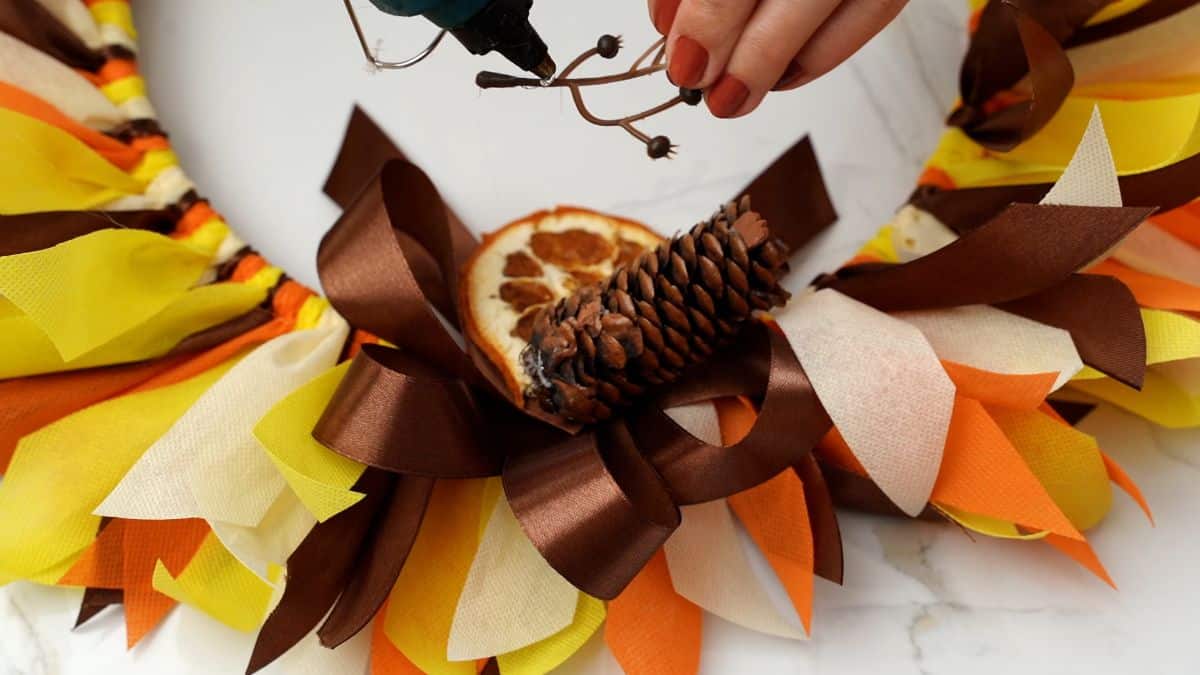
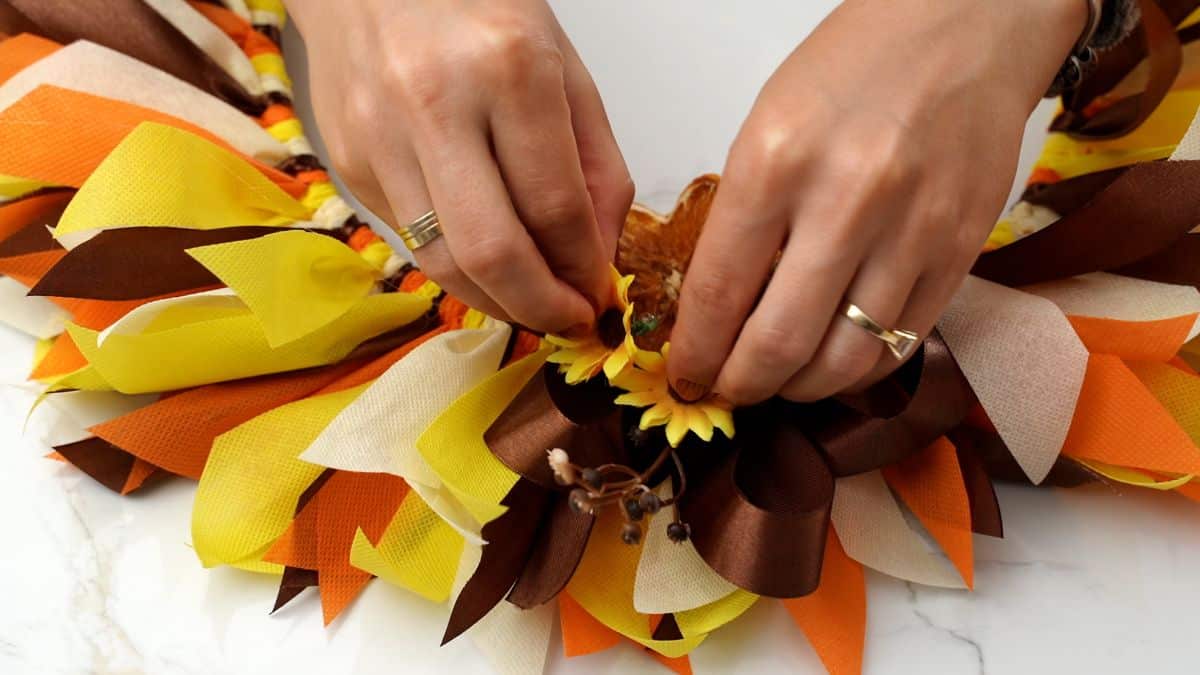
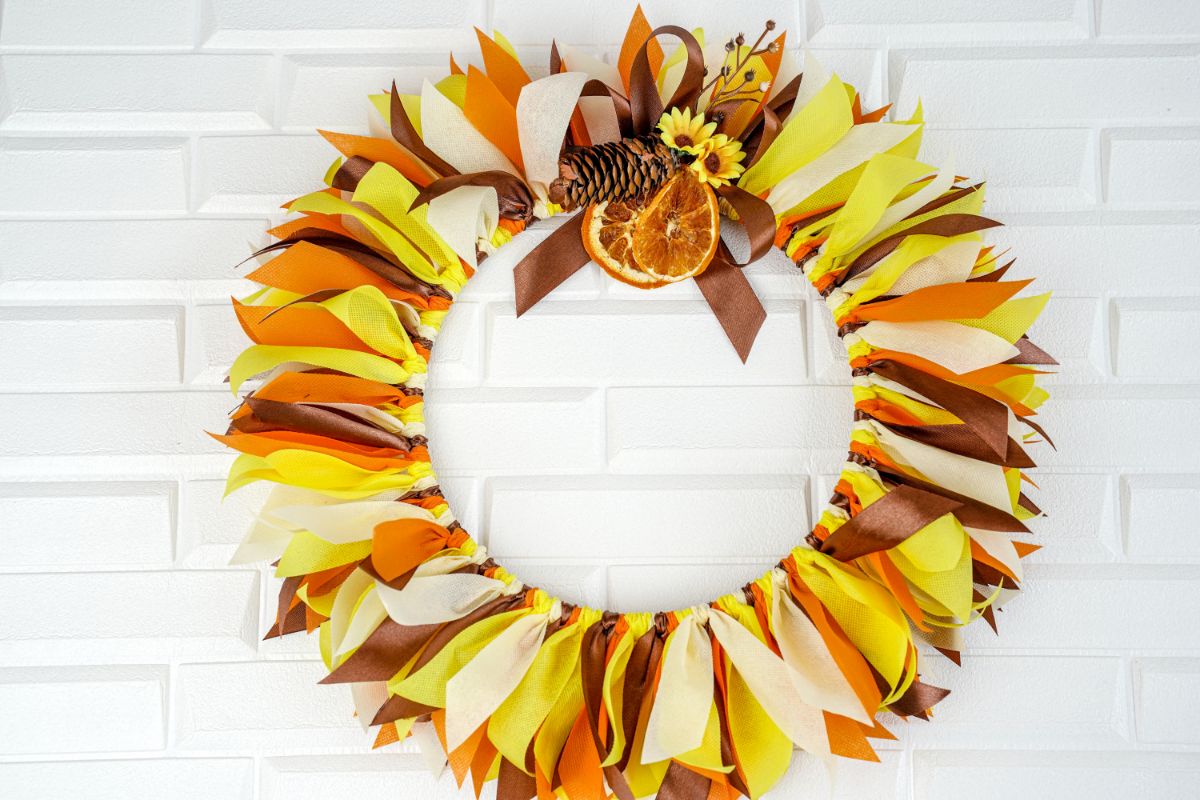
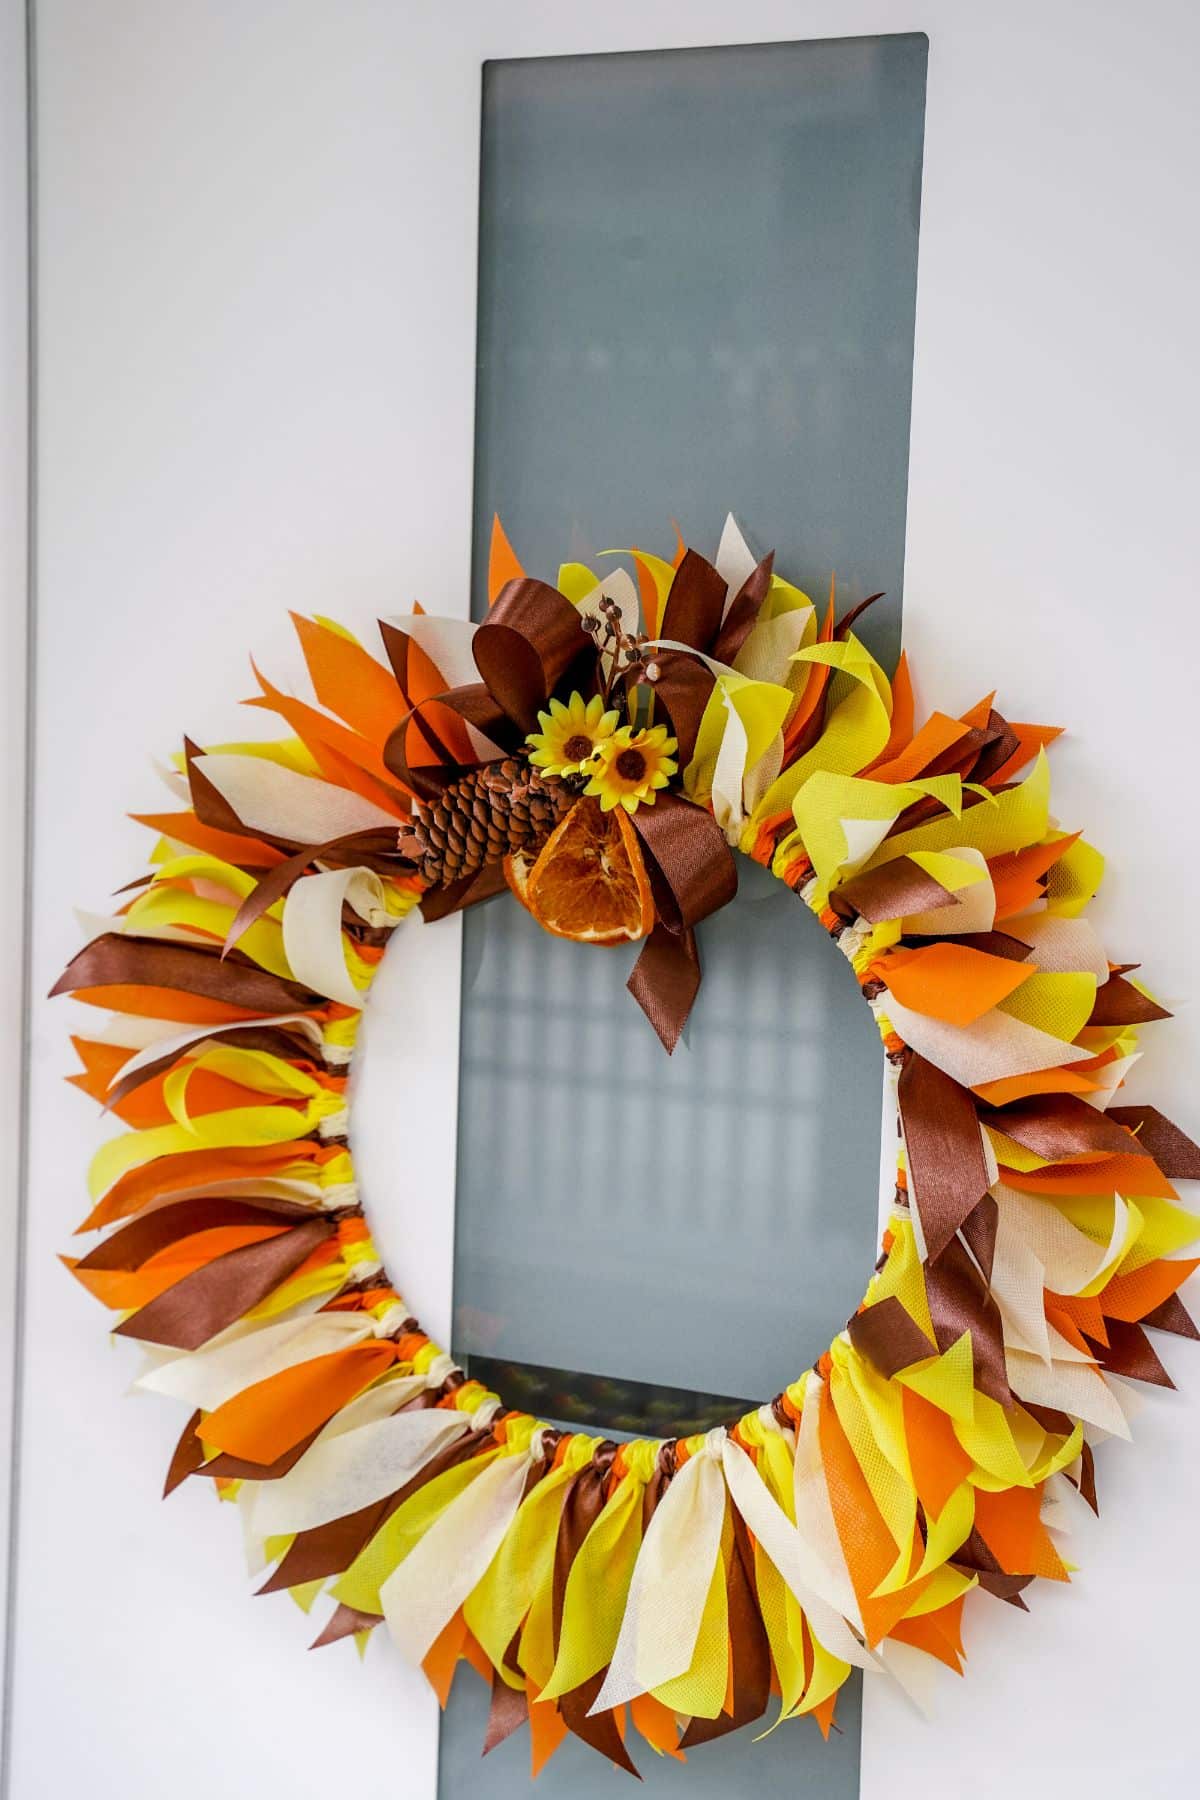
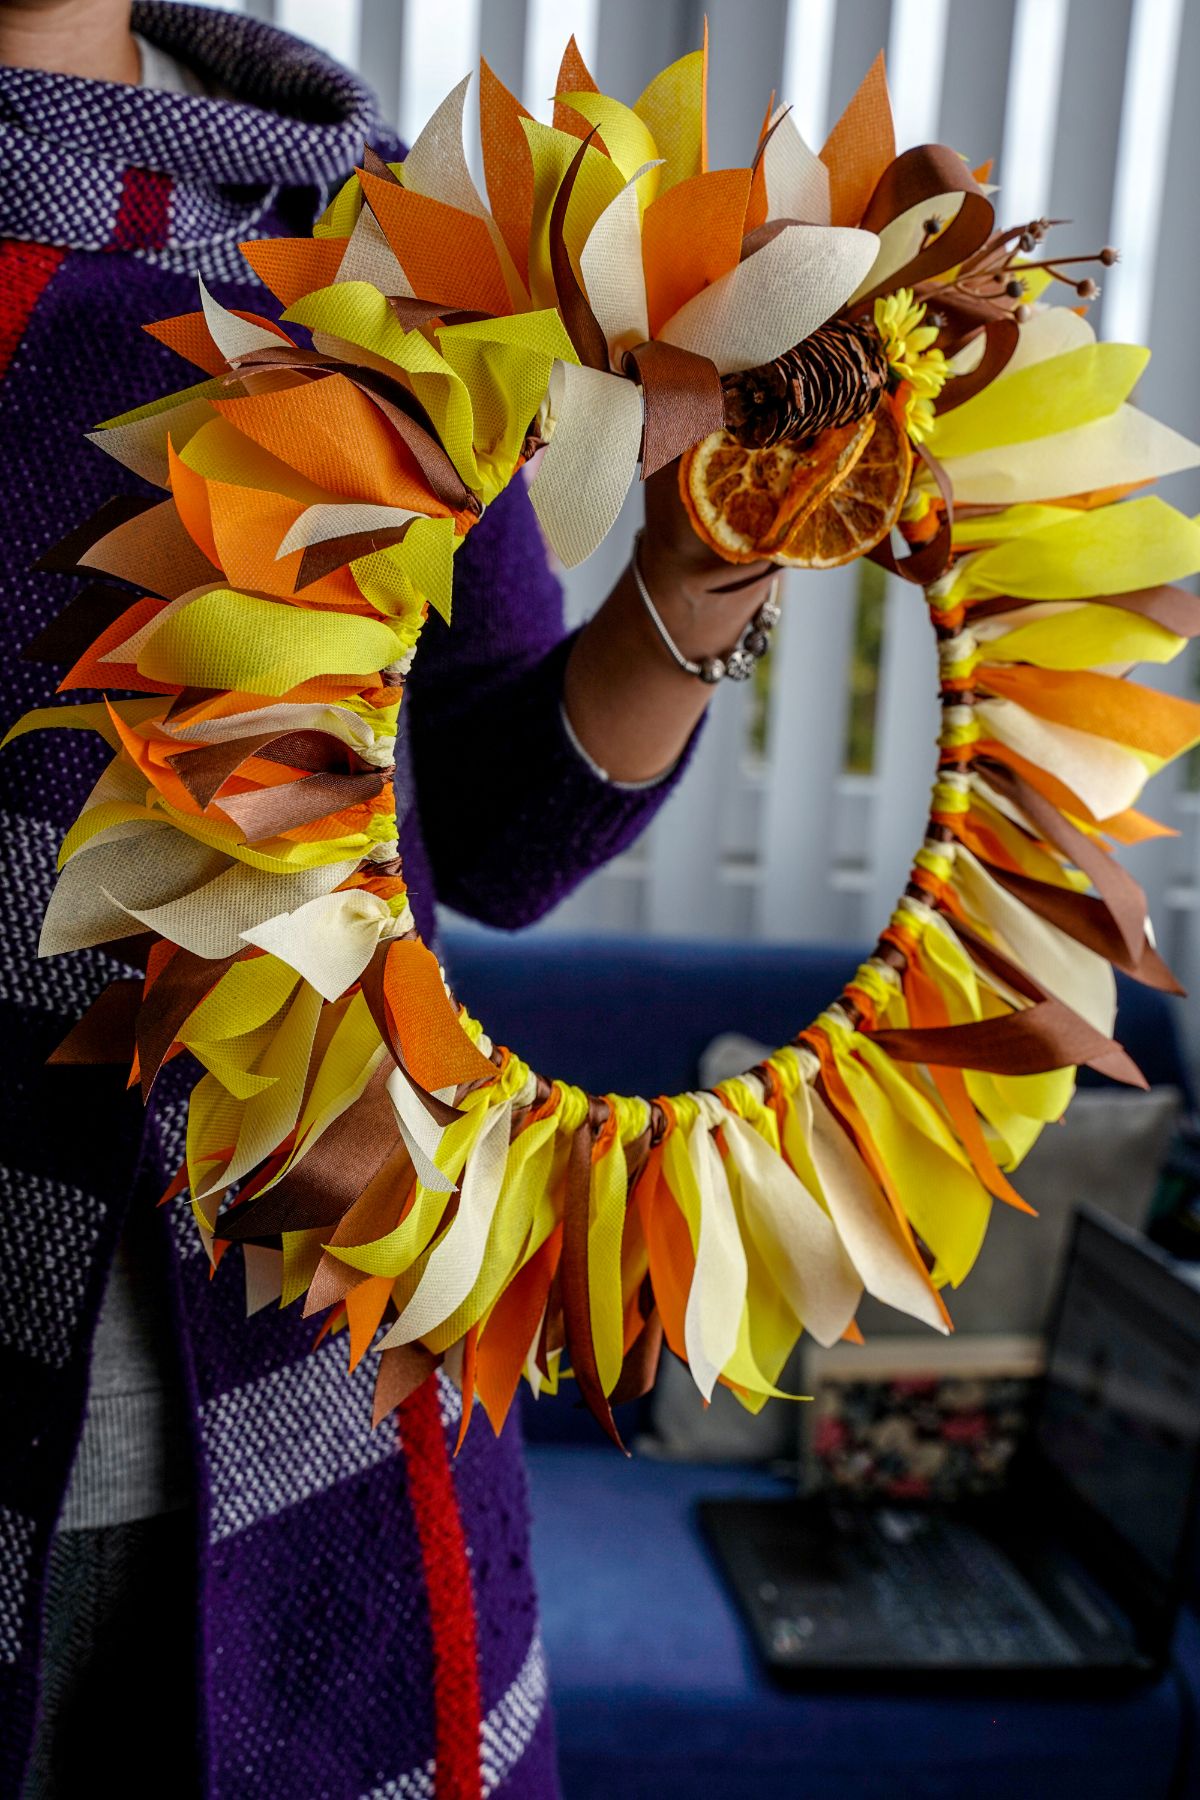
Now, use extra brown ribbon to create a large bow and glue it into place on the top of the wreath.
Then decorate the bow with some pinecones, fake flowers, dried oranges, or other natural elements.
When you are happy with the look, you can add a length of twine to the back for hanging!
What’s the Best Way to Secure the Fabric to the Wreath Frame?
The best way to secure the fabric to the wreath frame is simply by tying it into place. A tight knot will hold the fabric onto the frame perfectly.
Can I Add Fall Decorations to My Wreath?
Absolutely. Adding fall decorations to your wreath can add even more seasonal charm. Below are some more ideas that will make your fall rag wreath even more rustic.
- Faux leaves
- Acorns, pecans, walnuts, or chestnuts
- Small pumpkins
- Artificial sunflowers
- Gourds
- Bows
- Monograms
- Welcome message
The additional decorations will add depth and visual interest to your wreath, making it a standout piece of autumn decor for your home.
How Do You Hang a Homemade Wreath?
Hanging a homemade wreath is relatively simple. There are a few common methods to choose from.
- Attach a sturdy ribbon or string to the back of the wreath by tying it securely to the wreath frame.
- Invest in a decorative wreath hanger that fits over the top of your door. These hangers come in various designs and materials, and they provide a convenient and elegant way to display your wreath.
- If you want to hang the wreath on a glass surface or a surface where you can’t use nails, consider using adhesive hooks specifically designed for hanging wreaths. Make sure the adhesive is suitable for the weight of your wreath.
- Command Hooks are another excellent option for hanging wreaths on various surfaces. They are easy to apply and remove without damaging the walls or doors.
- If you prefer a simple approach, you can use a regular hook or nail on your door or wall. Just be careful not to damage the door or wall surface when hammering the nail.

Can This Be Hung Outside?
Yes, a homemade wreath can often be hung outside, but it depends on the materials that you used and the weather conditions in your area.
Similar Project: Rustic Twine Wrapped Candy Cane Ornament
Take these things into consideration:
- Weather Resistance. If you plan to hang the wreath outdoors, ensure that the materials you used are weather-resistant. Fabrics, ribbons, and decorations should be able to withstand exposure to sunlight, rain, wind, and other weather elements.
- Wreath Frame. Make sure the wreath frame is sturdy and durable. If you used a foam or straw-based frame, it might not hold up well in wet or humid conditions.
- Adhesives. Check if the adhesives used to secure the fabric and decorations can withstand outdoor conditions. Hot glue tends to hold up better than regular glue in varying temperatures.
- Sheltered Area. If possible, hang the wreath in a sheltered area, such as a covered porch or under an awning, to protect it from direct exposure to harsh weather.
- Bring it Indoors. Consider bringing the wreath indoors during particularly severe weather, such as heavy rainstorms or extreme temperatures, to prolong its lifespan.
- Seasonal Wreaths. If you plan to hang the wreath outside for an extended period, consider creating seasonal wreaths that can be easily replaced when the weather takes a toll on the current one.
Tips for Cutting Fabric
Cutting fabric properly is essential for any sewing or crafting project. Here are some tips to help you achieve clean and precise cuts:
- Use Sharp Scissors or Rotary Cutter– Make sure you are using sharp fabric scissors or a rotary cutter. Dull blades can result in jagged edges and frayed fabric.
- Use a Cutting Mat- When using a rotary cutter, place a self-healing cutting mat underneath the fabric. This protects your work surface and allows the rotary cutter to glide smoothly.
- Straighten the Fabric– Ensure the fabric is straight and not folded or skewed before cutting. Align the fabric edges with the grain (lengthwise and crosswise threads) to prevent stretching or distortion.
- Hold the Fabric Firmly– Keep the fabric flat and taut while cutting to prevent shifting, which could lead to uneven cuts.
More Fall Decoration Tutorials
Below are more adorable and rustic ideas to add to the autumn seasonal decor around your home. Pick your favorites and bookmark them to make soon!
Yield: 1
Similar Project: How to Make Decorative Fall Leaf Candle Lanterns
Bring autumn charm to your home with our DIY fall rag wreath. Colorful, rustic, and perfect for your fall decor.
Prep Time
10 minutes
Active Time
30 minutes
Total Time
40 minutes
Difficulty
Easy
Estimated Cost
$5
Notes
- This can be made with any fall-colored or themed ribbon or fabric
- Use any wreath frame you prefer, just make sure you can tie the ribbon around and leave a few inches on both sides to hang.
Similar Project: 15 Creative DIY Garden Decor Projects That Fit Into Any Budget
Recommended Products
As an Amazon Associate and member of other affiliate programs, I earn from qualifying purchases.


